We’re back! This week, learn how to make your own set of pressing tools, and check out the free downloadable pattern for a tailor’s ham, seam rolls in two sizes, and the ever-useful boob ham!
Read MoreThe Monthly Draft 5: A-Line Scalloped Skirt
The Monthly Draft is Back! Check out how easy it is to draft a simple paneled skirt from your skirt draft - and if you're feeling particularly bold, add some scallops to the hem!
Read MoreReusable Grocery Bags: The Art of Design for $1 or less.
In which we sew shopping bags for less than $1, and contemplate their attractiveness.
Read MoreWith Pockets to Hold All My Secrets
Drafting and sewing a jumpsuit that hugs like a cloud, and with pockets to, well, you know.
Read MoreLand of the Sun, Home of the Sheep (and Occasional Possum)
We're going to take a short break from our regularly scheduled adventure-programming to talk about the things that happened during my 3 months in New Zealand when I wasn't busy climbing mountains and romping on beaches- I'll give you a hint... There was a lot of knitting. This little corner of the internet was originally created for the purpose of blogging about all the projects I get up to, and it seems that regardless of the mountains in my immediate vicinity, I still find myself needing to do something with my hands.
First things first. I met this pretty lady at Jon's parent's house: I did a little research and it turns out that Wheeler & Wilson, the manufacturer of this machine, was bought out by Singer in 1905, which means this machine was probably made in the late 1800s. It's not particularly rare, but it is a very lovely machine, and it's an interesting combination of things I'm used to on old machines. It has the modern upper threading path, which has changed very little since its original design, but the bobbin mechanism is a different story. The first successful sewing machine was designed in 1830, and this machine used a shuttle bobbin- a long, narrow piece which slips into as bullet-shaped device. The whole mechanism moves in a curved forwards-backwards motion under the machine when it's sewing. My treadle machine at home has a shuttle bobbin.
The shuttle bobbin was eventually replaced with a stationary bobbin, which continues to be the standard for modern machines because it's less prone to jamming, mechanical issues, and being generally finicky. This machine was obviously made during the transition period, because it has a modern style bobbin and casing, but the mechanism still moves under the machine like a shuttle. Very weird, but very cool and clever. She hadn't been used for a good couple of decades, but she was in great condition regardless. All she needed was a bit of cleaning and oiling, and a new belt. (ebay for 3 dollars, if you're curious.) The most difficult part was coming up with a project for her once she was ready. That didn't turn out to be so hard either, though- It's unreasonably sunny in New Zealand (40% more intense UV rays than the US), so I chose to make a super simple shoulder-covering Sun Protection Device- complete with fringe!
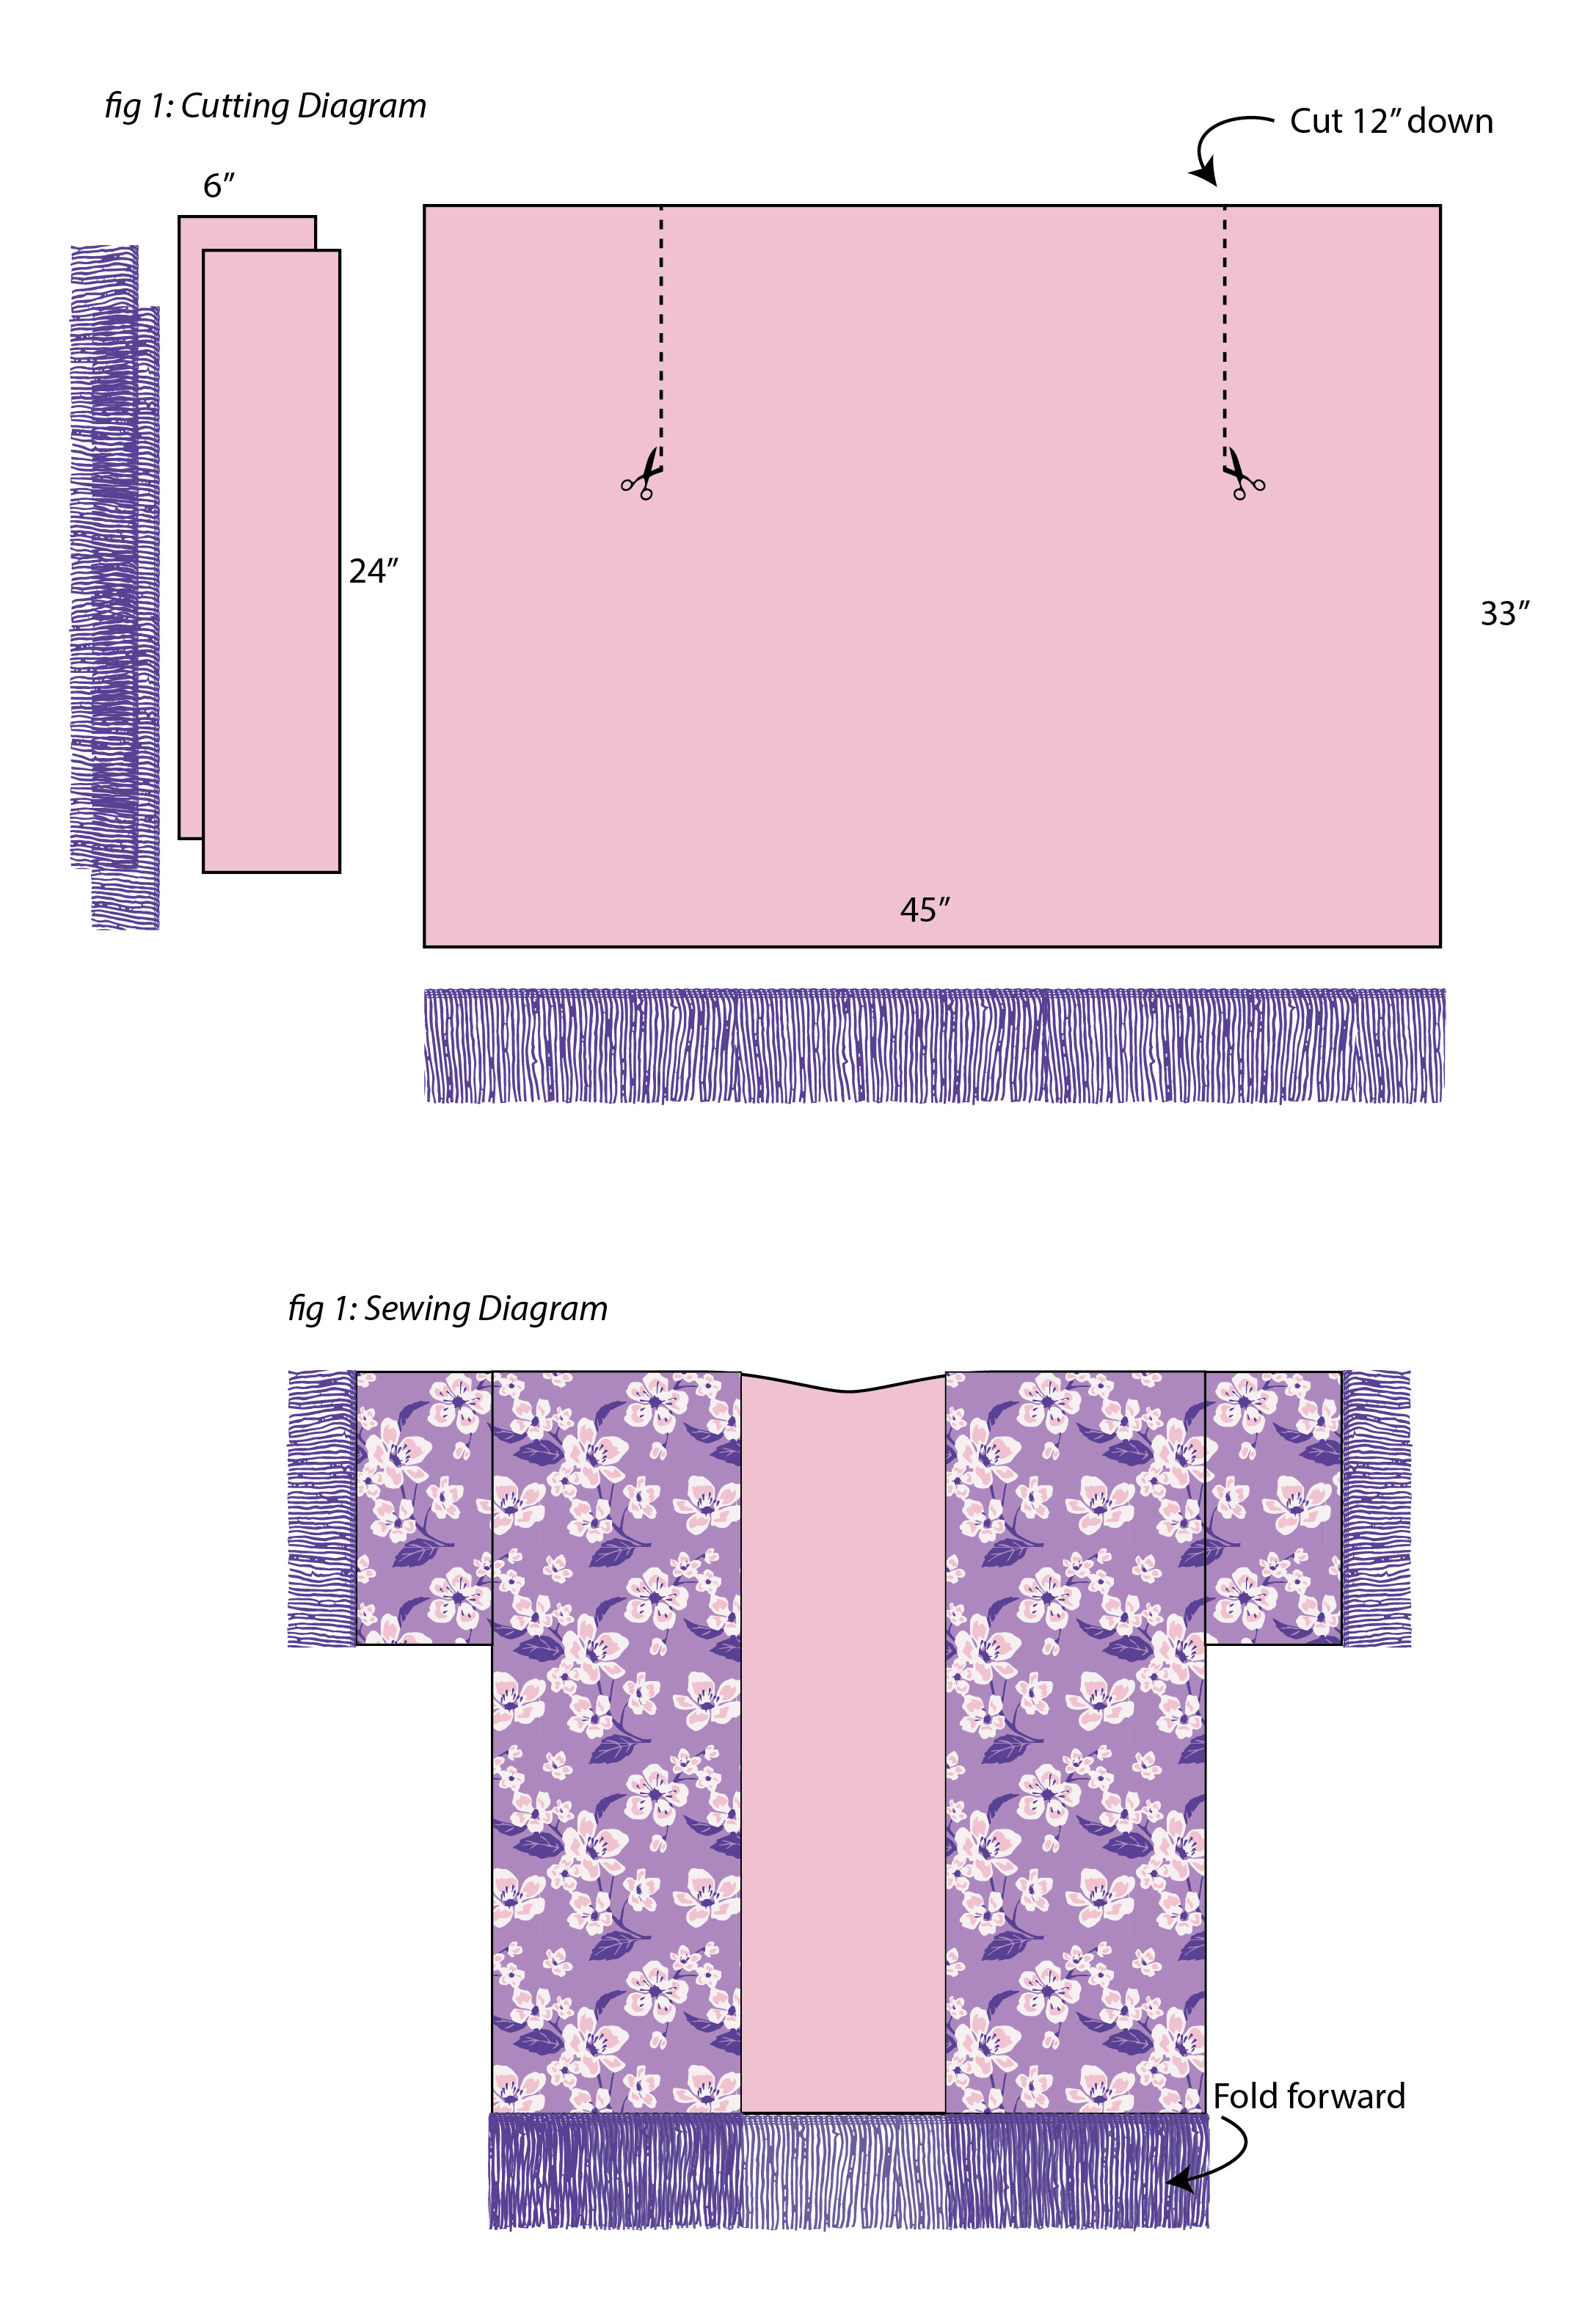
I used about 2 yards of printed rayon fabric, and a couple of yards of satin fringe in two different lengths. I think it's supposed to be upholstery fringe for pillows and stuff, but it matched my fabric too perfectly to pass up. If you're curious, and because nobody in the world deserves sunburnt shoulders- I've made a diagram:
This way I don't have to write the whole thing out, you see. It's very simple. You attach the sleeves to the cut slits, and then sew the tops of the sleeves and the shoulder seam all in one go. The only not-pictured step is the binding to finish the front and neck- that's just a 4" wide strip that runs up one front, around the neck, (which I trimmed into a slight curve) and down the other side. The shoulders and armholes are french seamed to add stability and hide raw edges, and the fringe is also encased by the fabric, so nothing unsavory is showing anywhere.
See? Easy as pie. And these things sell at markets and such for something like 60 dollars. Really, you could use whatever kind of fabric you wanted- I've even seen some with lace. This one happens to match my swimsuit though- and my hair, apparently- which is always a nice touch.
Including the fixing up of the sewing machine, that project was completed in the span of two afternoons. These next two basically occupied the rest of my down-time between adventures, given one took significantly longer than the other.
This pattern is Sparrow Song by Anne Hanson, made with some Possum-Merino yarn I got in New Zealand. Possum is a pretty uniquely New Zealand thing, and it's very very soft, and very warm- even if the concept is a little weird. Possums in New Zealand are a totally different thing than US possums, though. As for the yarn, it's a bit hairy and sheds at first, but only a little. Still totally worth it. In other news, I really love this cowl pattern. It's knit top down, and then the bottom edging is a knitted-on border completed last. It's a bit ridiculously warm.
In a problematic and cruel twist of fate, however, I have only been able to wear it about twice because it is very warm and, because New Zealand's seasons are opposite from ours, I've essentially had two summers in a row with about 3 weeks of winter in between. By the time my next trip is completed, I will have had four consecutive summers without a full winter in between. I probably won't get much use out of this cowl in that span of time, but I'm certainly going to try.
Here's the next (and significantly larger) project:
Leaves of Grass by Jared Flood. The pertinent information for both of these projects can be found in more detail on my Ravelry page, if you're interested in making them. This is a circular shawl knit from the center out, and has yet another knitted on border. I think knitted on borders are my favorite technique in knitting. The only other thing that comes close is gusset heels...
The other particularly exciting thing about this shawl is that it's an Elizabeth Zimmerman Pi Shawl. There are only four increase rows in the whole project- in between each lace pattern. This allows you to substitute in any other lace stitch if you're not feeling whatever's written in the pattern, since you aren't limited by needing to match increases. I didn't make any changes to this one- maybe next time.
I cast on for this shawl a day or two before I left for New Zealand, and I finished it in the Los Angeles International airport on my way back home. Not that I was working on it constantly, but it took basically the whole three months. It was actually pretty great travel knitting. The only awkward part was when I dropped my ball of yarn behind my seat on the return flight, and had to employ the gentleman sitting behind me to retrieve it. He was a good sport, though.
The last part of this crafty little side note is more of an in-progress sneak peek, because it's getting a blog post all to itself later on. One of my favorite things to do on warm summer evenings (in December, I'm actually still not over that weirdness)- was hunting for sea glass on the beach. We'd drive to the beach after dinner, stop for ice cream, and walk along the beach looking for pieces of sea glass.
This is a photo of what we gathered after the first ice-cream laden evening. I wanted to make myself a necklace, but ended up finding enough pieces on the trip that I decided to share the love a little bit more than originally intended. We found so many pieces that I had to leave most of them behind, but the others- well, you can find some of them here if you're curious, but the details will come later.
You've probably noticed that not everything in the picture is sea glass- there are also ceramic shards, although they're a much rarer occurrence. According to the all-knowing interwebs, they're called 'beach pottery'- and I will let you know as soon as I figure out what I'm going to do with them.
I'm a material person. I like stuff, I like projects, and I am the kind of person who needs to have something to do with my hands, pretty much all the time. I may have been in New Zealand to see the sights and climb the mountains, but I had just as much fun with my projects and I'm especially happy knowing that I can still get my materials and work on things there, since I'll be going back for a whole year in a few months. In the meantime, I'm going to continue to wear my knitting around even though summer's almost here...
(next time, mountain-adventures. I promise)
Wax on, Wax off
Questionable Karate Kid reference aside- one of my favorite parts of this new-found freedom I seemed to have developed (read: I had never realized how much creative energy school sucked out of me....) is the opportunity for new projects! Batiking, for those of you yet unaware, is a traditional Indonesian technique for creating colorful patterns on fabric using wax as a resist, and multiple layers of dye.I'd always wanted to try it, but hot wax kind of scares me a tiny bit, and I could never really think of a project I wanted to do badly enough to bother with buying all the supplies. However, once I came up with a project, I did a bit of research and it turns out the tools you need aren't all that expensive!
I've so far spent two weekends batiking- It's kind of an all day affair because of the waiting time while fabric is dyeing, and then drying. I set myself up a nice little workstation (on my handy-dandy-all-purpose-worktable-that-is-mostly-for-screen-printing) and put on some tunes:
The Supplies:
Test Fabric (I used some scraps of muslin I keep on hand for days like this)
Dye (Fiber Reactive dye. You can't use acid dye because the heat needed for that chemical process would melt the wax. sigh.)
Fabric (for your actual project! Stick to cellulose based fibers like cotton or rayon- not too delicate, and not too tightly woven, or the wax won't penetrate.)
Batiking Wax (a blend of paraffin and beeswax. It's available premixed, or you can buy them separately and mix them yourself!)
A wax melting pot (Not for food! choose one that's as small as you can find, but deep.)
An electric burner (for obvious, wax-melting purposes. With a fairly accurate adjustment knob)
A clip-on thermometer (of the non-digital variety)
Tjantings (the copper tools for drawing wax onto your fabric)
Large wax pot (Not for food! Your project must be able to swim freely in this pot)
Wax tongs (Also not for food!)
There! That's a start. We'll get to the why's of some of those specifications momentarily. None of it's very expensive- the most expensive item was the electric burner, which I found on amazon for $17, and which I can totally use for other things. It's handy. Even the Tjantings are hardly a budget breaker. I bought all my supplies at dharma which I love and would be nowhere without. Also, if you have questions about anything fabric-related, the nice people at Dharma will probably know the answers.
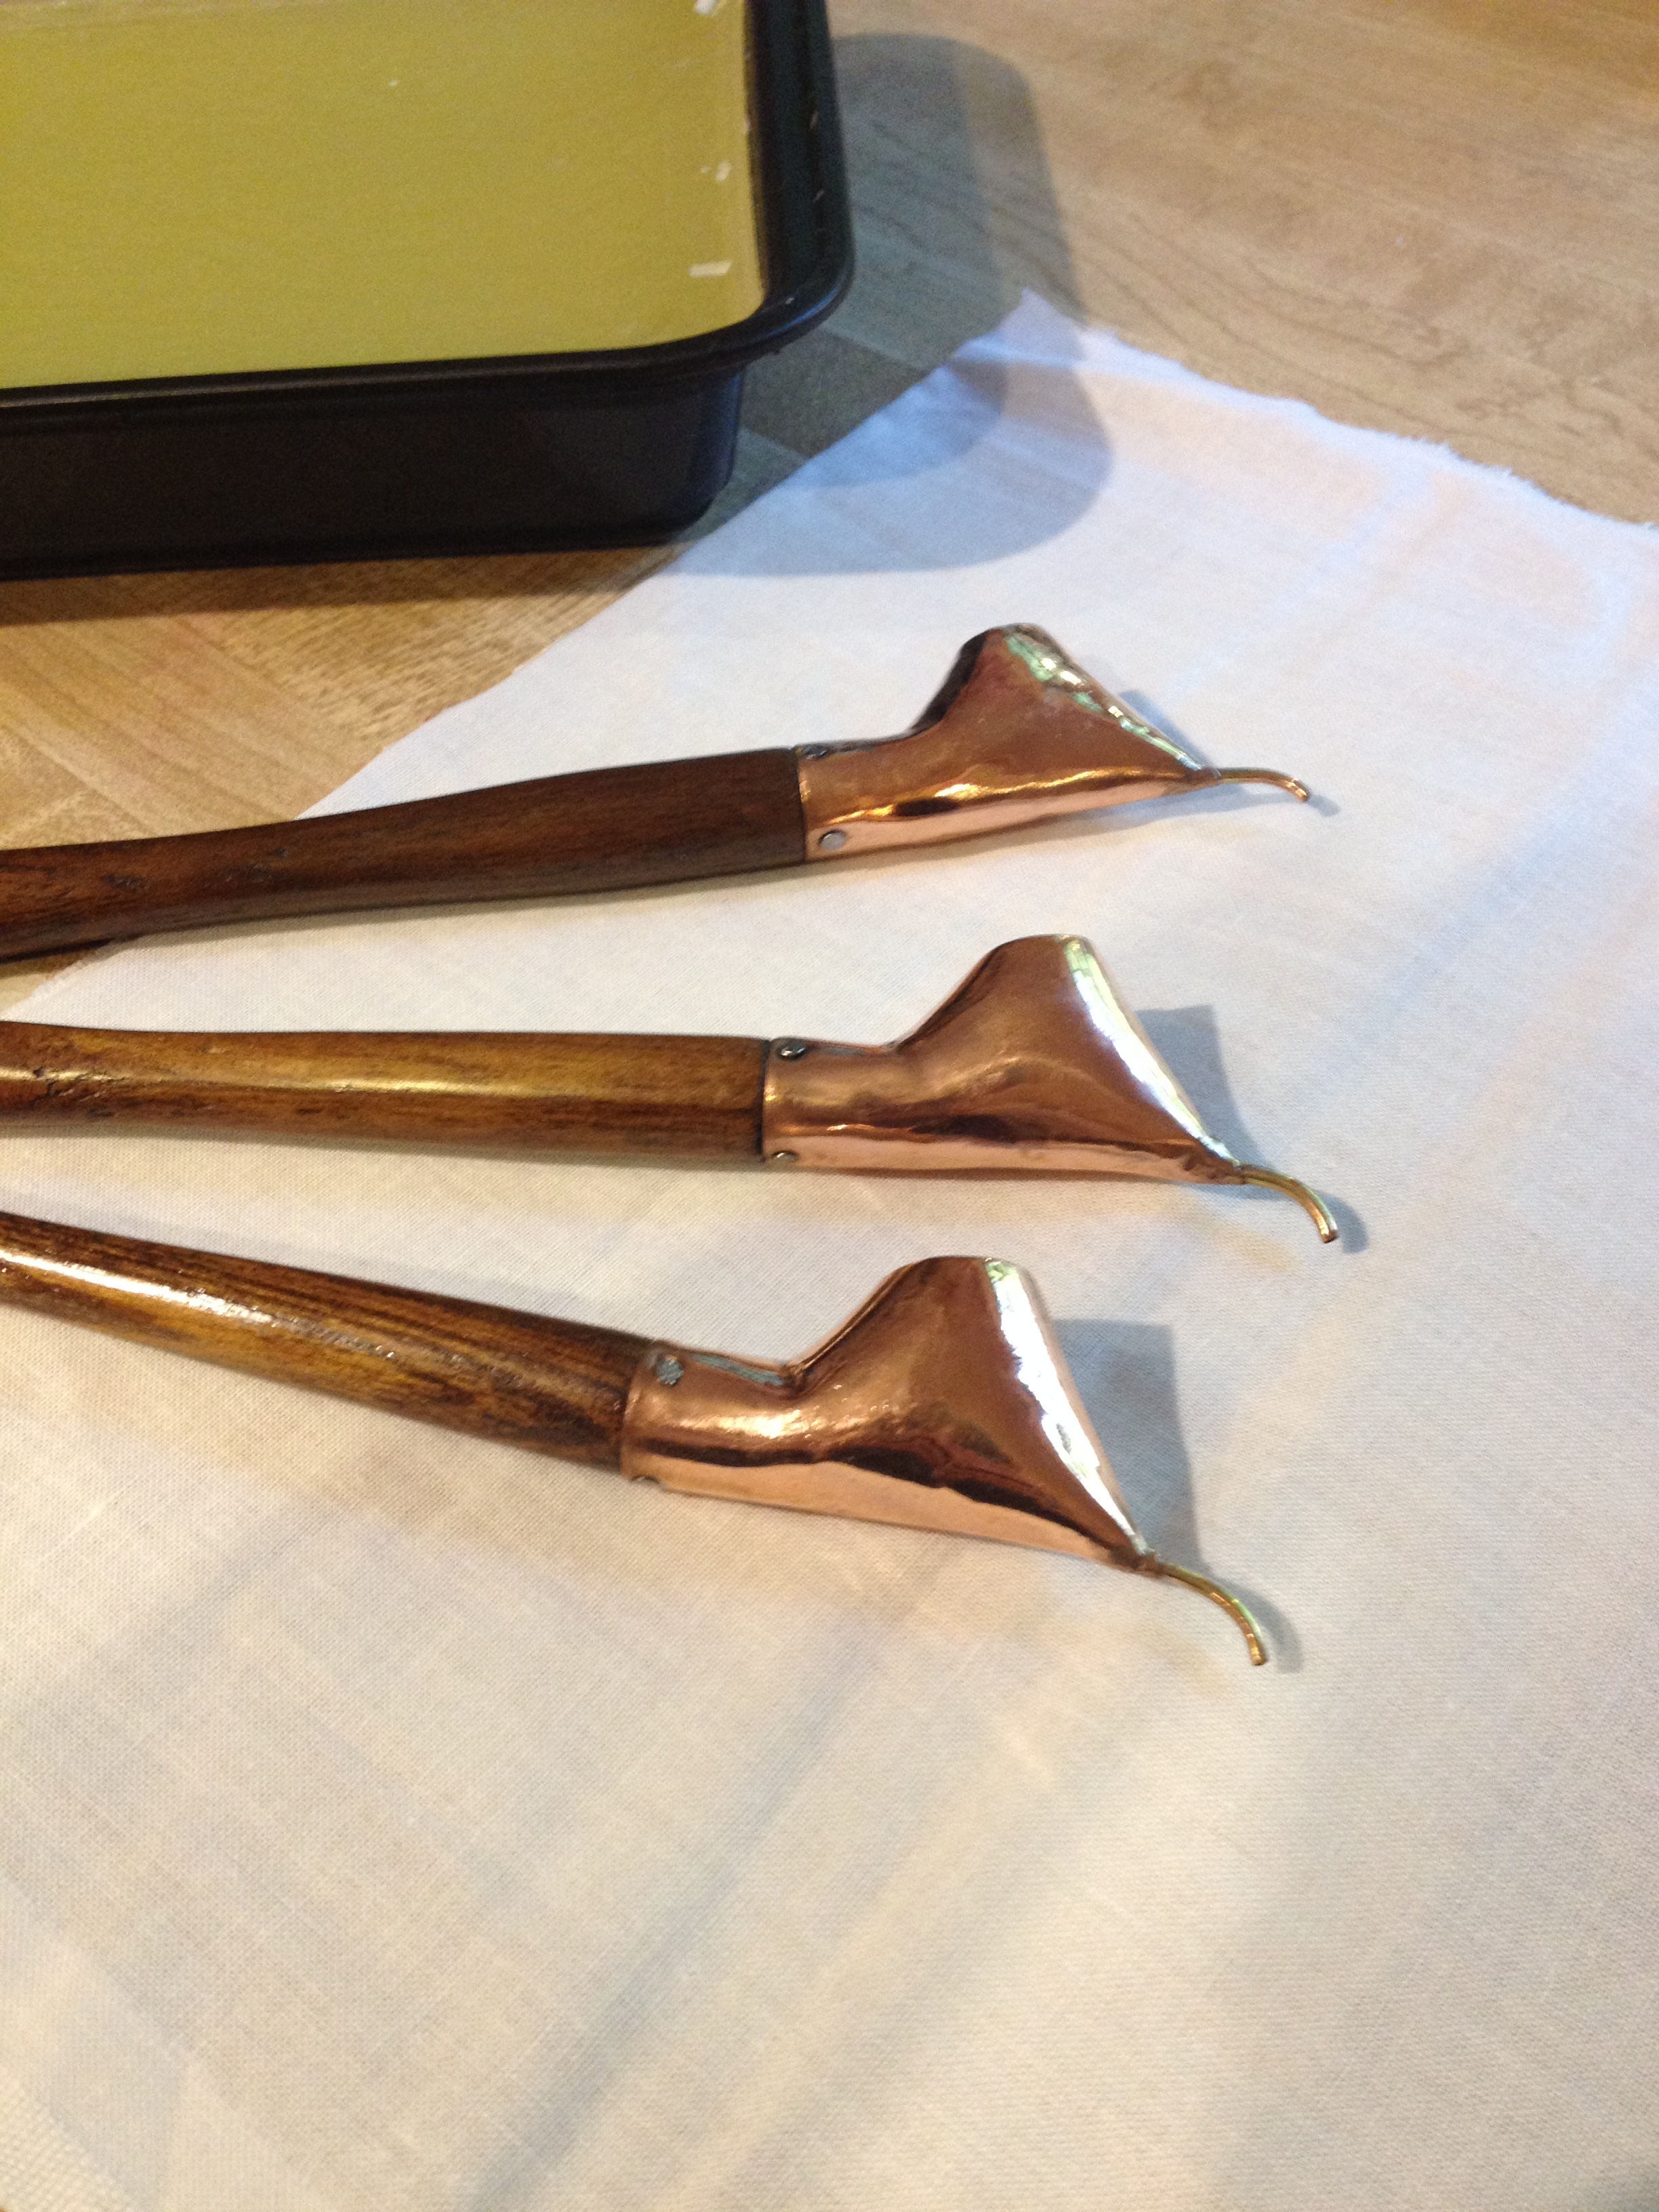
Here's a closeup of the tjantings- I bought three different sizes- the holes in their spouts are different sizes so the molten wax will come out at different speeds, allowing for thicker and thinner lines. That said, I definitely used the thinnest one about 95% of the time, after I played with the three to get a feel for them. The largest one deposited so much wax so quickly that it dripped through the fabric straight down onto my hands, which was fairly unpleasant. Wax at this temperature will probably hurt a bit if it drips on you, but it shouldn't burn or blister. It's about the same as a low-temp hot glue gun. I'm a bit more sensitive to temperature extremes than most people, so I was careful. That one's best used for thicker fabric, I suppose.
Don't stick your fingers in the wax pot. Did your mother teach you nothing as a child?
Wax On:
As to how one physically goes about the task, there are a few ways to do it. A lot of tutorials I found have you pin the fabric so that it's suspended above your workspace, but if you look at most videos of batiking on YouTube, they'll just be holding the fabric in their hands, suspended using their fingertips underneath and drawing lightly from the top with the Tjanting. Tjaps (the copper stamps used to make repeating and intricate patterns for batiking) are a different story that I'm not talking about because Tjaps really are out of my price range. By a lot. Which is unfortunate given how beautiful they are.
When starting to draw in each color, or when switching tools, hold the Tjanting's head submerged in the wax for a few minutes so that the copper can heat up; your wax will flow more easily that way, and you'll be able to draw for longer without a refill. Anyways- this is how I ended up holding my Tjanting- you, should you choose to batik as well- should obviously play around with it and decide what works for you. Especially if you're a leftie.
The wax burns at 245 degrees (Farenheit!)- and the internet tells me that it erupts violently in flames and is very difficult to put out once it ignites. This is why you need a thermometer and a burner with a fairly accurate adjustment knob. You need your wax to be around 23o in order to be hot enough to flow easily, but don't let it get above 240! Also, don't put water on a wax fire- use baking soda to extinguish infernos.
Now that we've gotten through the setup, the rest of it is pretty straightforward. Draw on your white fabric, with the wax, in whatever areas you would like to be white. Then, pop that sucker into a dye solution (cold water only, or you'll melt the wax!) If you're using a soda ash solution, which you should be if you're using fiber reactive dyes, you'll want to make sure to take your fabric out after no more than 30 minutes, because the soda ash has a nasty habit of eating away at the wax.
Rinse (literally) and repeat: Draw more wax in the areas you want to remain that color, dye, rinse, draw... you get the picture.... The most awful part of the process is waiting while the fabric is in the dye bath, and waiting for it to air dry once it's out (Can't put waxy fabric into mom's dryer. Would probably be disowned...or yelled at...)
In the above photo, you can kind of see the cracking in the waxed areas where the darker colors are coming through. That's because of the wax mixture. Beeswax is very flexible at room temperature, but it gets gummy really quickly on its own. Parrafin wax is very flaky, and also doesn't adhere well alone. The combination of the two produces the crackling, while still keeping the wax adhered. People who do this a lot make their own mixtures with more of one or the other, depending on how much or little crackling they wish to occur. I happen to really like it just how it is, so I'll keep on keepin' on with my 50-50 blend.
Eventually, you'll either fill up your fabric with wax or run out of darker colors to dye your fabric. If you haven't already, you're probably wondering how to get all that wax out of there.
Wax Off:
This is why I said not to choose anything delicate. The definition of that, in this case, is don't choose anything that wouldn't like to be boiled- because that's how you get the wax out. I found my pot at goodwill for $4.50- it's a canning pot, and will be just large enough for my dress when it's time to make that.
This is a pretty fun part of the process- you fill the pot with enough water that your fabric is completely submerged (the more wiggle room the better), and boil the living daylights out of it. I don't mean just bring that pot to boiling and then shut the stove off, you have to boil it and agitate it while you're boiling it for a good 10 or 15 minutes, so that all the fabric that is caught in the folds of the fabric is dislodged and melted. Then, take your pot off the heat, and use your tongs to carefully drop some stones into the pot. These will weight down the fabric so it doesn't float up and touch the wax layer while it's cooling. I used some smooth river rocks that I stole from the garden in our front yard. If you get rocks from outside, give them a good scrubbing first, your fabric will thank you. You could also use any other object as a weight, as long as it's heavy and rust-proof.
The wax will cool in a skin on the top of the water (Science!) and the fabric will remain safe and wax-free underneath. Now, you have to wait for the pot to cool entirely....
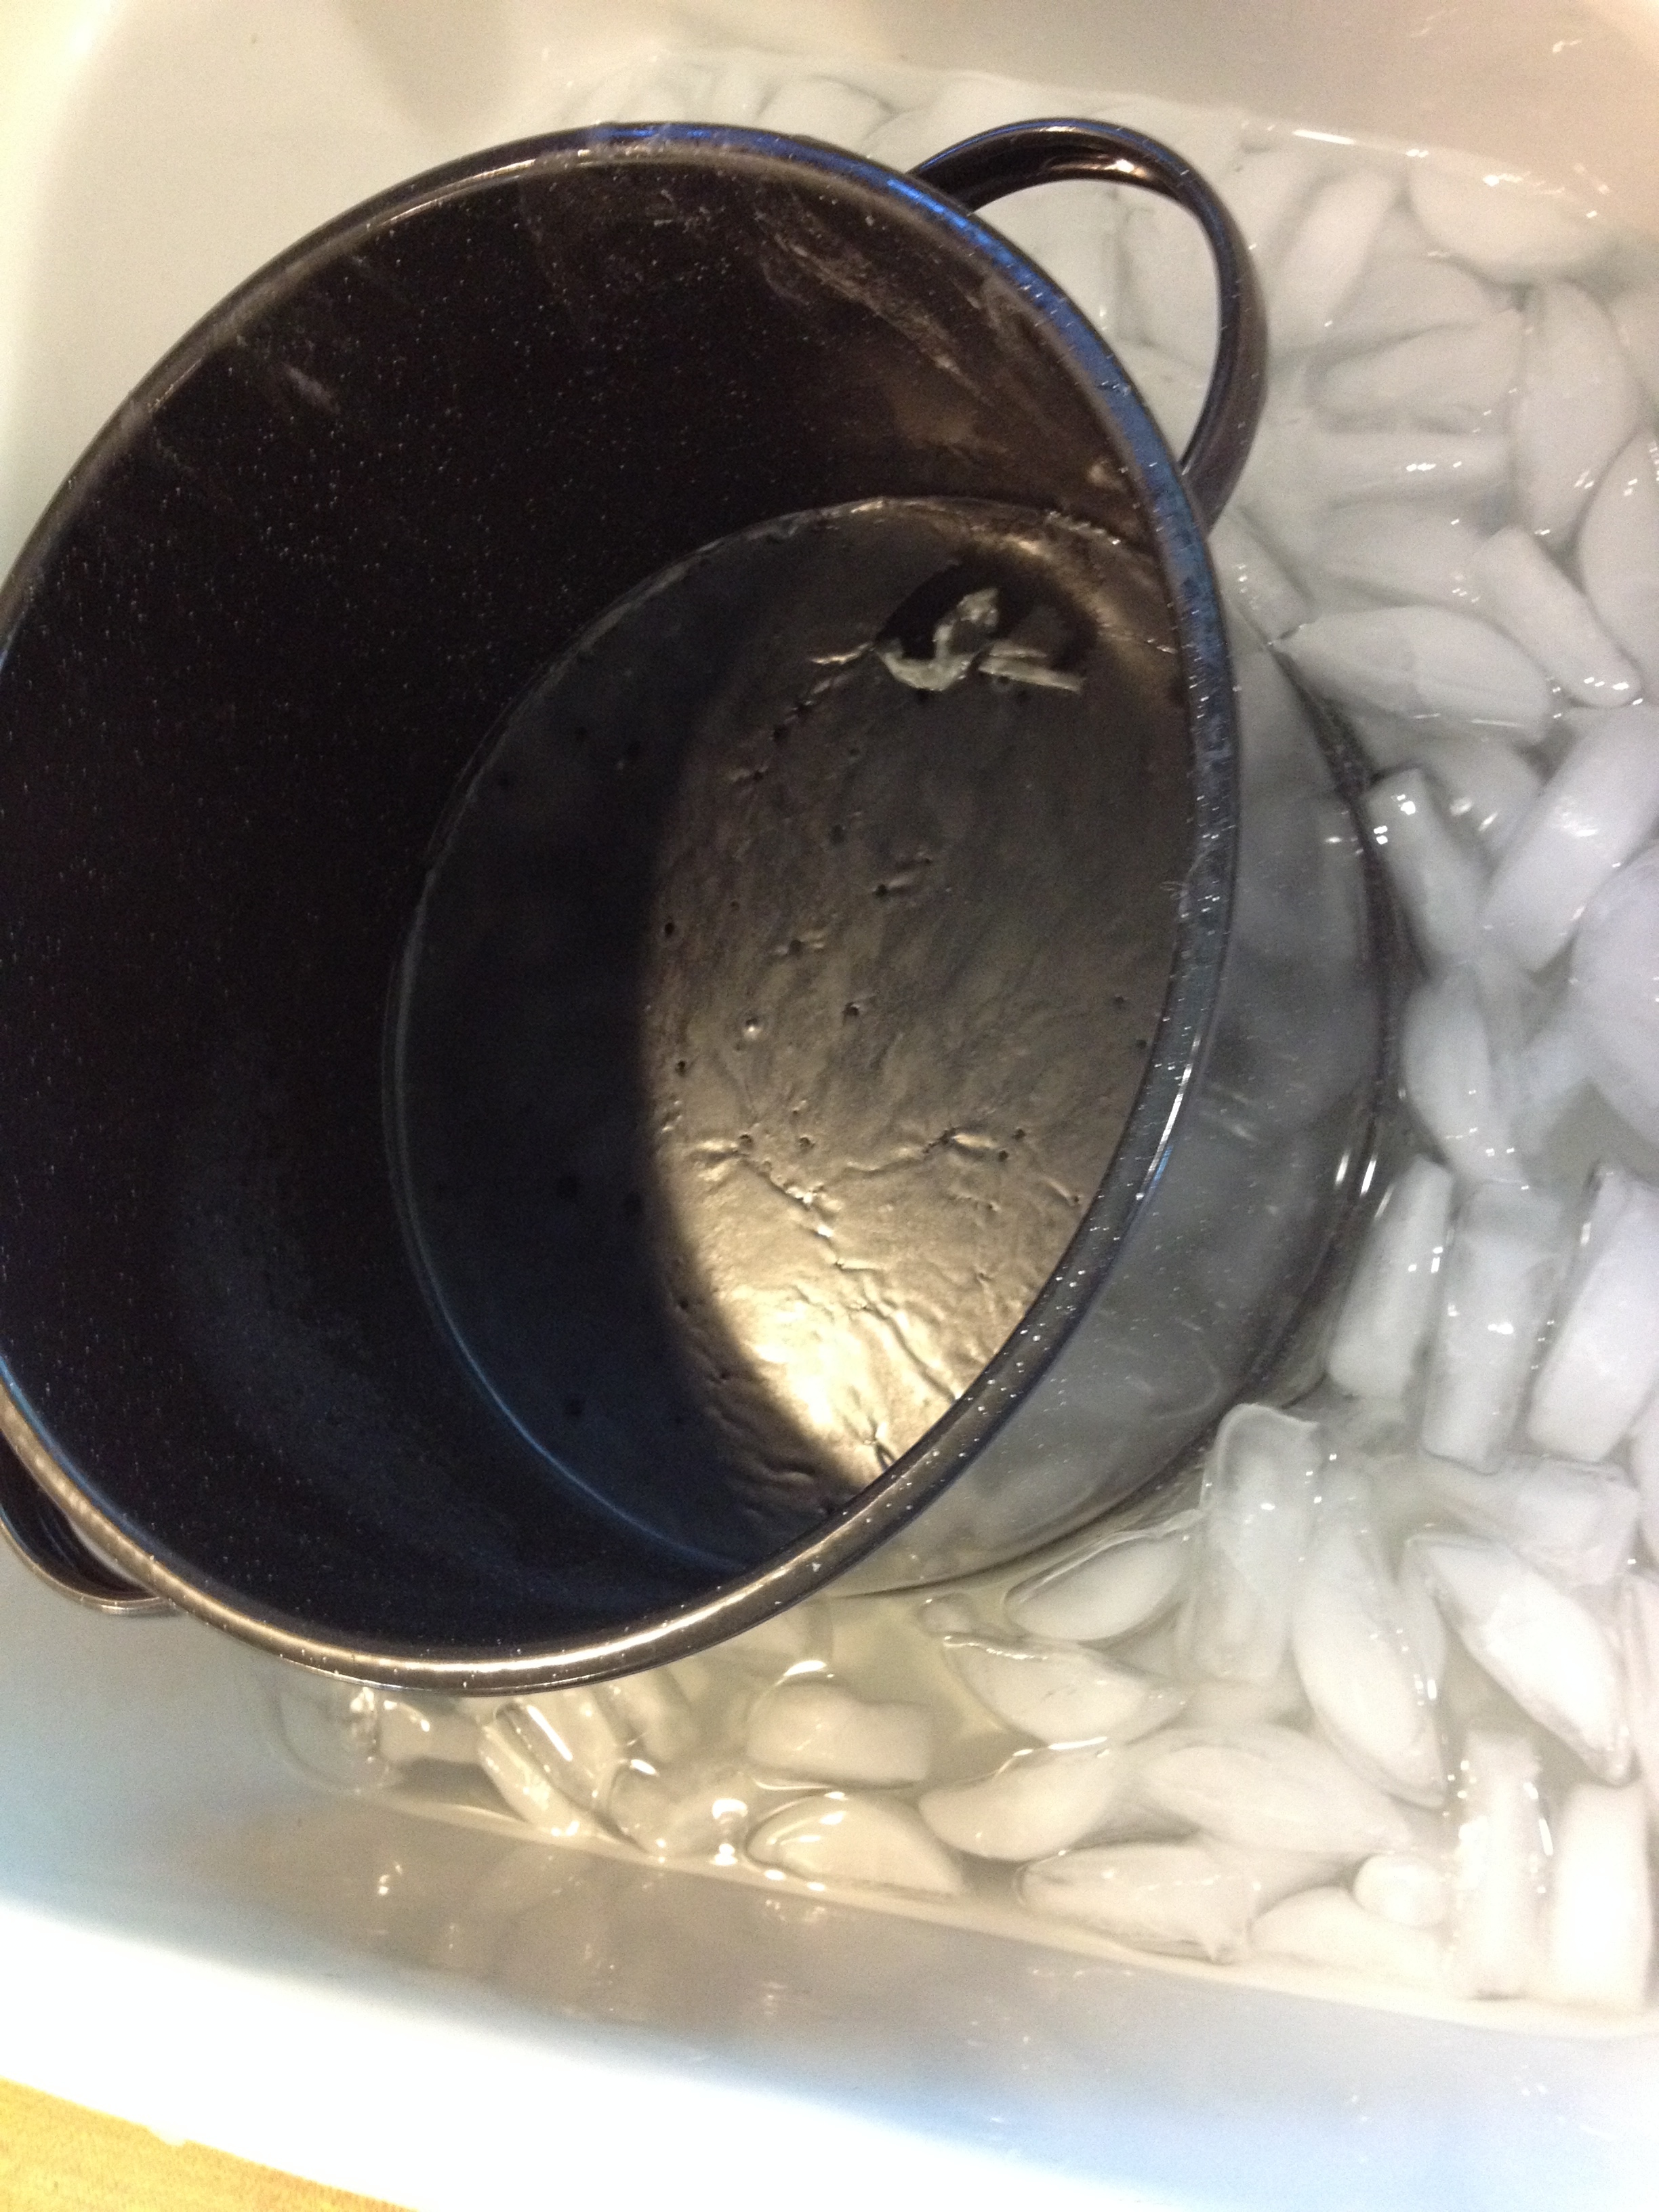
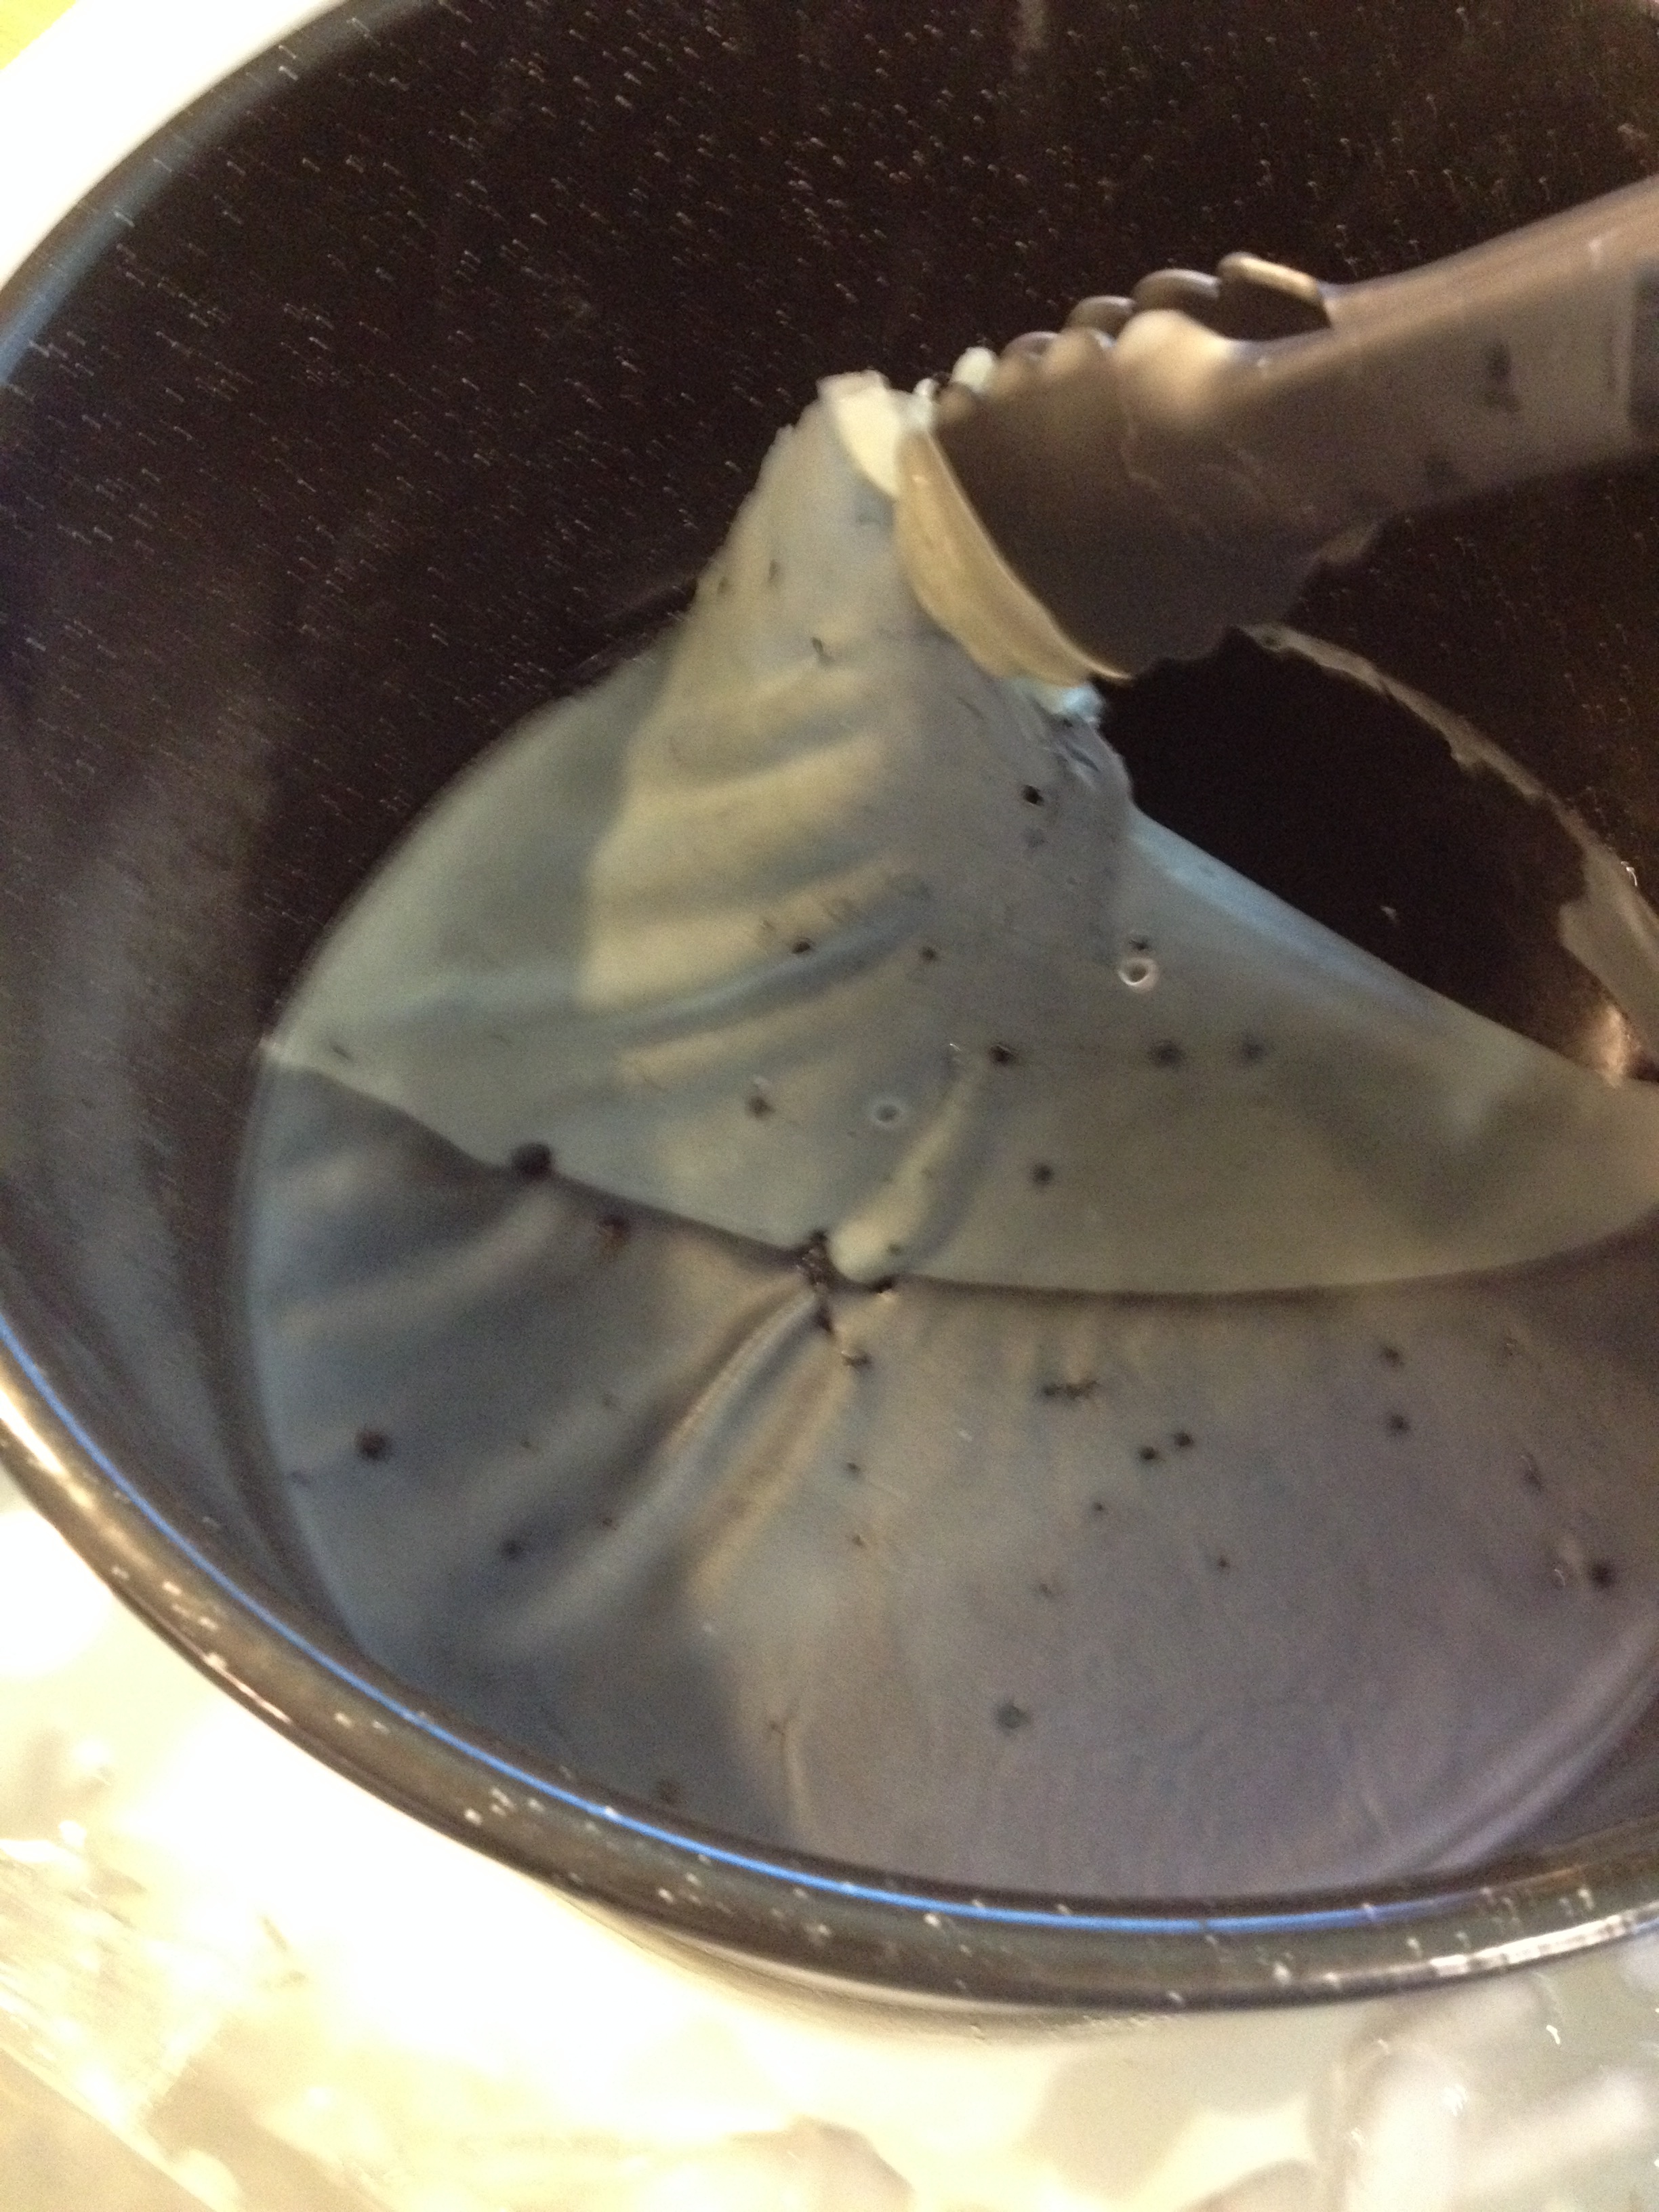
Impatiences sparks ingenuity- I didn't want to wait for it so I filled the sink with cold water and ice cubes so that the water inside the pot would cool faster. After you're sure it's completely cool (this next part won't work if it's not) it' time to remove the wax. Take your wax-only tongs, and pinch the wax at one side of the pot, pulling up and around slowly. This bit reminded me of peeling Elmer's glue off my fingers- it comes off like a layer of skin. there may be some pieces stuck in a ring around the pot, but that's okay, The water is cool so the wax can touch the fabric without anything bad happening.
Put the wax on a paper towel to dry- the great thing about Batiking is that there's very little waste! After you're sure there are no more water droplets adhering to your wax, you can drop it back into your small wax pot and use it again! Then, get your stones out of the bottom of the pot so they don't scratch it, pour the fabric out, and give it a good washing. If you can still see spots of wax, you didn't boil it for long enough. and Voila! your batik project is complete!
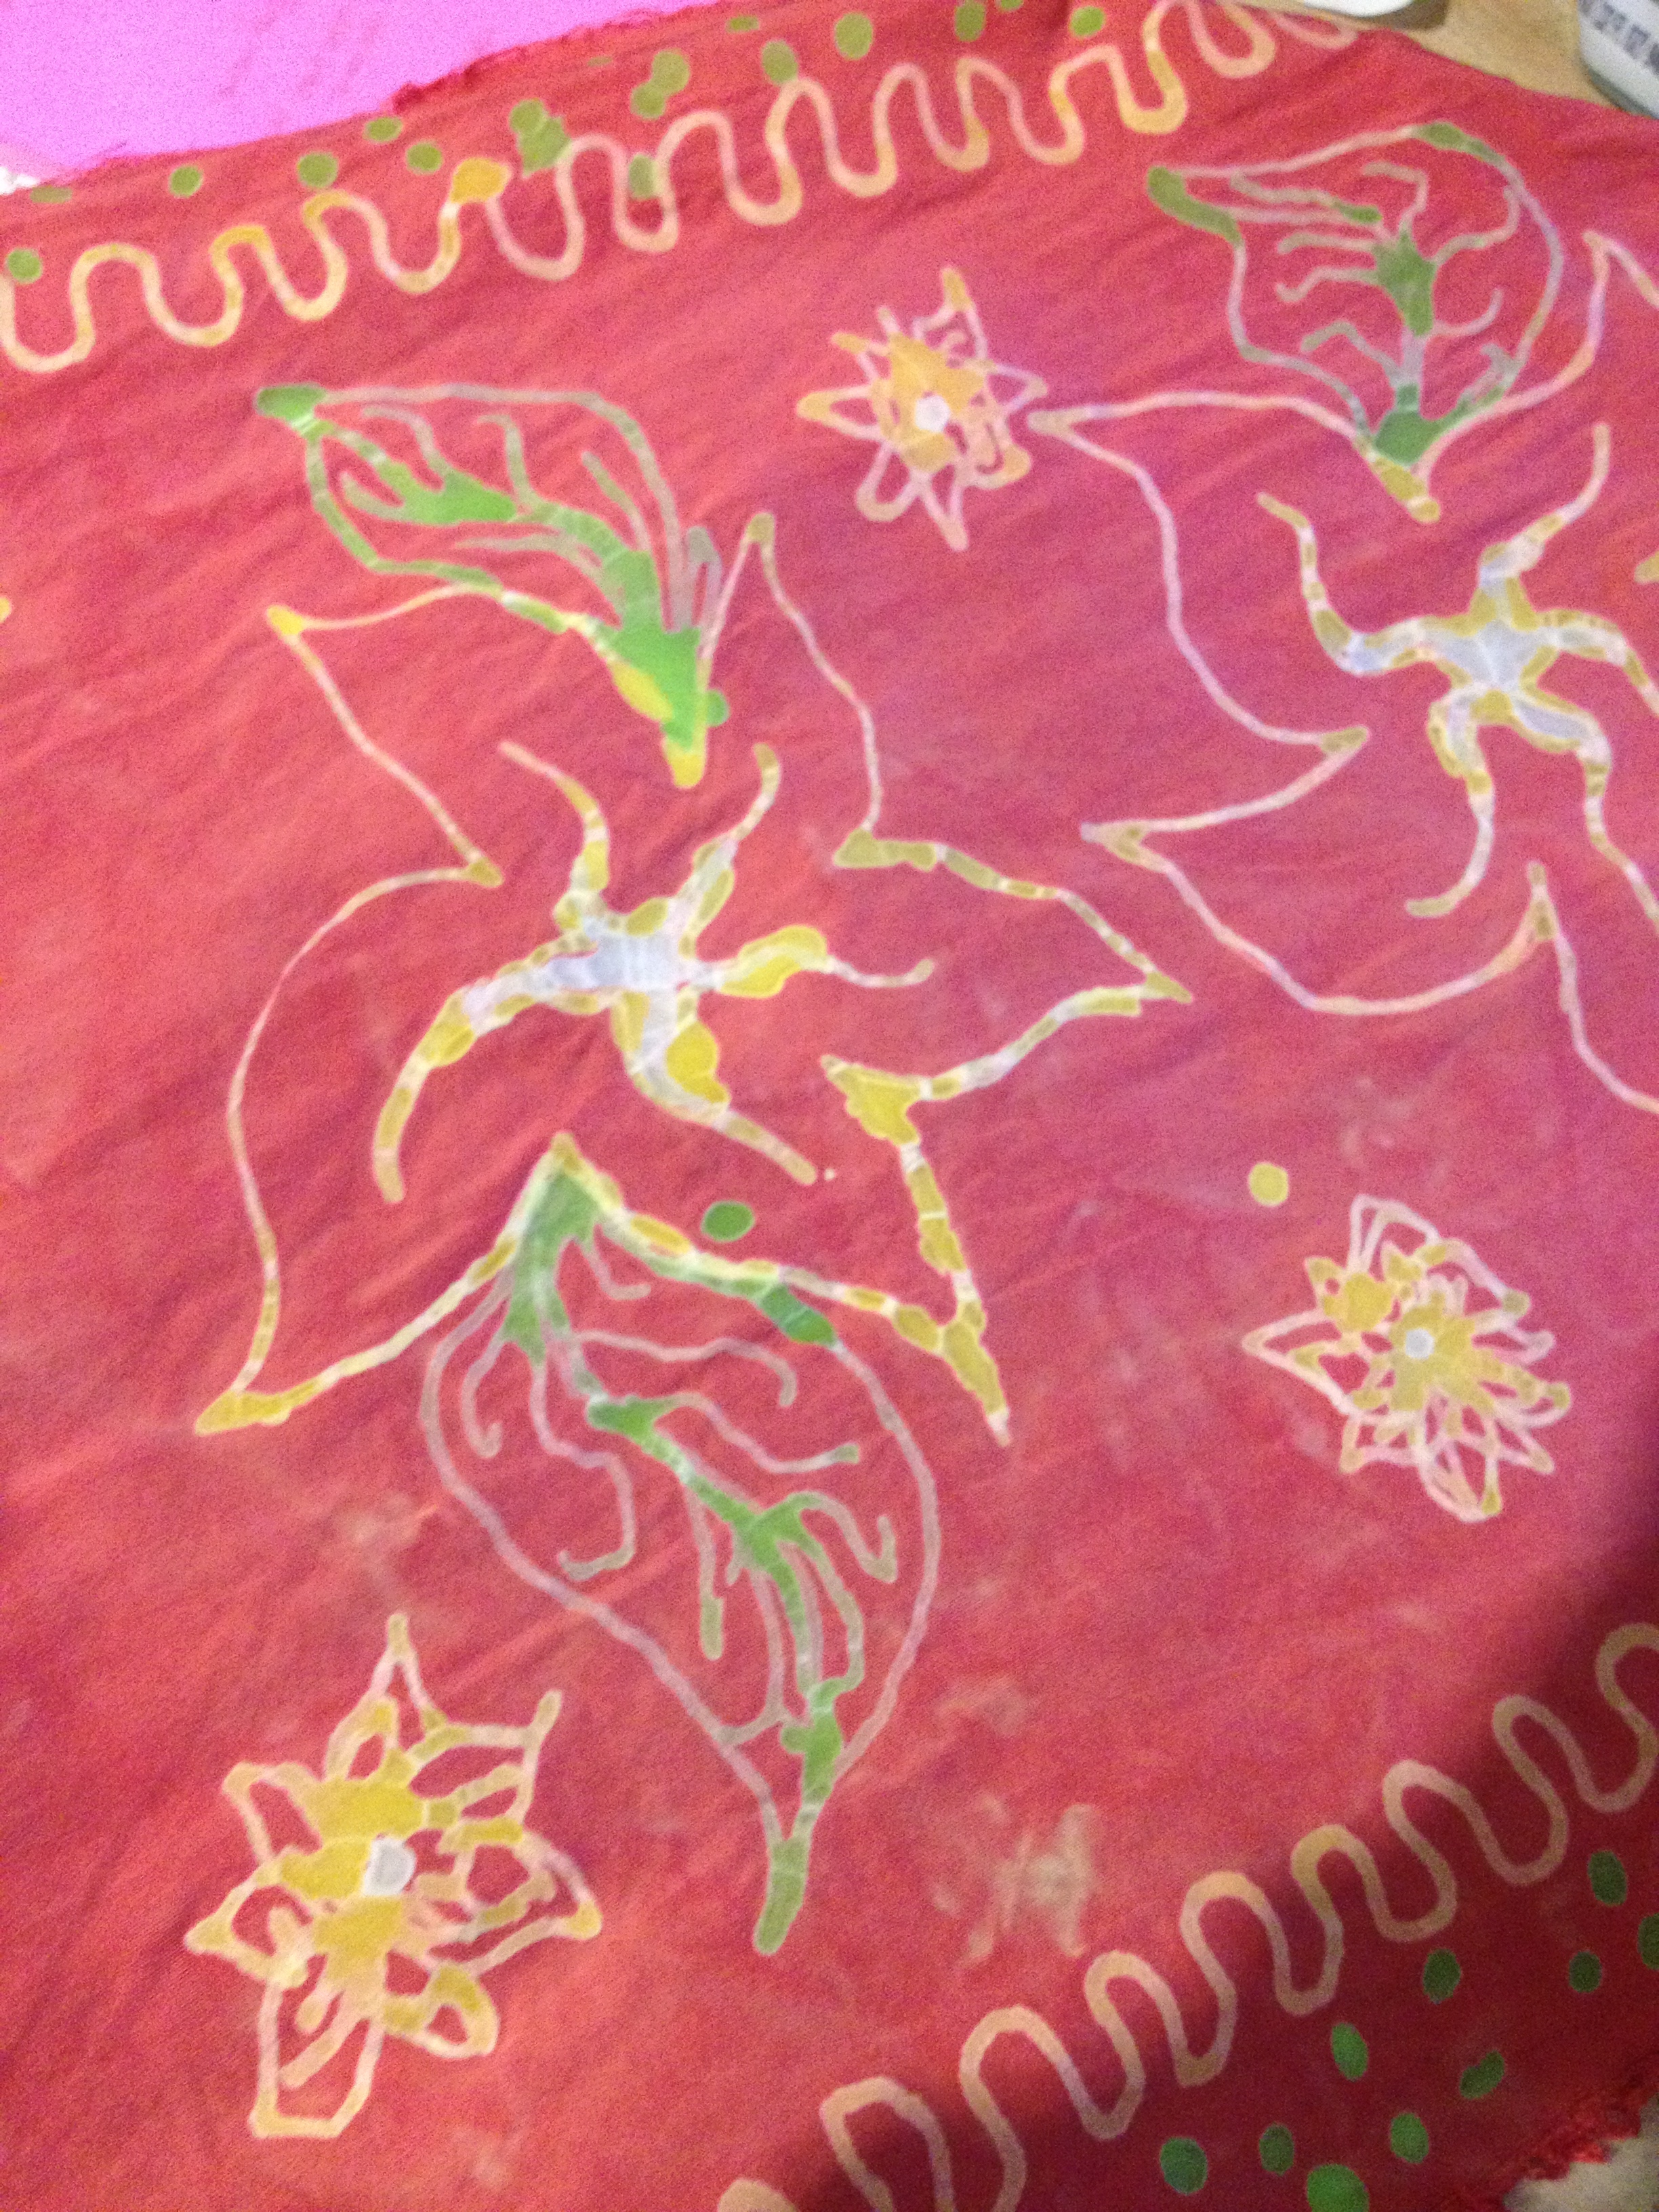
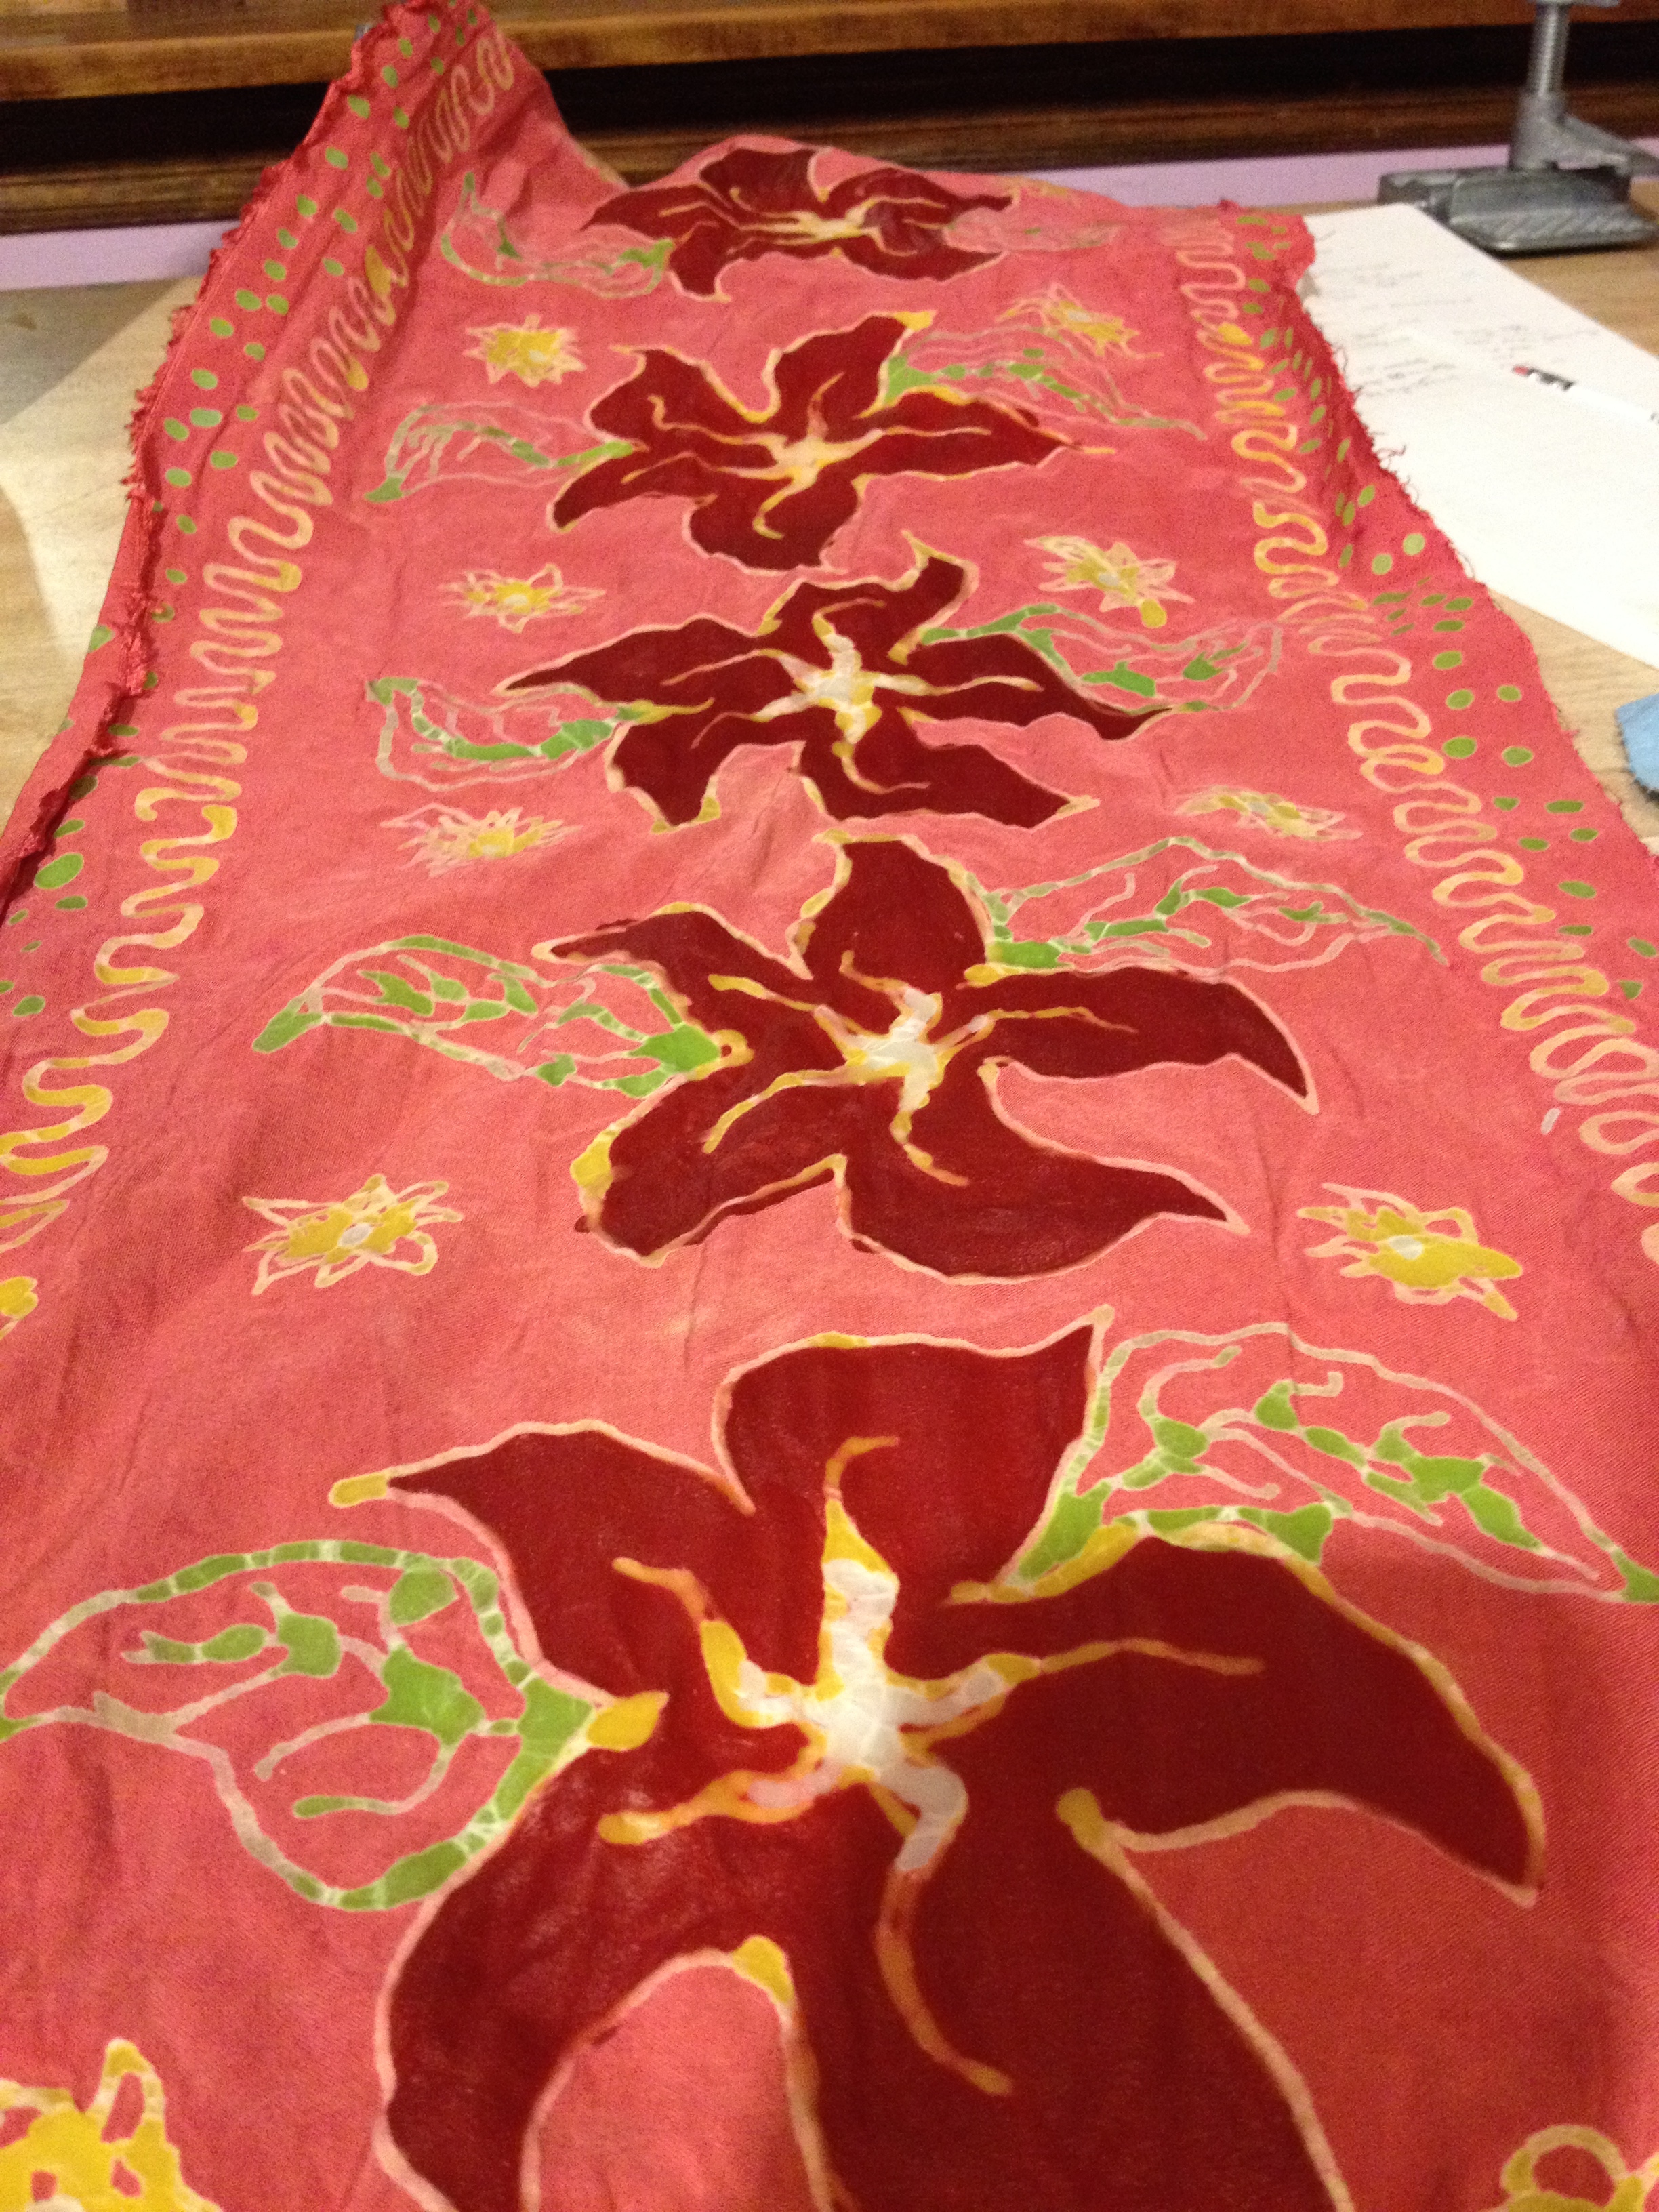
After the test swatches, I made a head scarf using some of the rayon fabric I'm eventually going to make my dress out of, so that I could make sure it handled the dye adequately.
It dyed a little lighter than I was anticipating, and it seems like a lot of batikers have this problem. If you want to get dark colors, especially after multiple previous layers of dye have gone into the fabric, try some of Dharma's after-soak. Basically, it sets some of the dye that's still bonded to the water in your dye bath to the fabric,and you end up with richer, darker shades without having to soak for longer and risk having your soda ash dissolve the wax.
After the batiking was done, all I had to do was hemstitch the edges and I had a brand new handmade headscarf! I'm so looking forward to this dress....
There are a lot of applications for wax-resist color techniques- I sort of thought the most popular was batiking but that idea bubble was popped as soon as I started telling my friends what my plans were that weekend: "I'm Batiking!"... "You're what?"... "Batiking!"... "That's not a real word. You made that word up. What is that?"
Indonesia uses wax resist for batiking, the Ukraine uses it to make multicolored and beautiful eggs called Pysanki- something we used to do around Easter every year as a family before we ran away to college. China uses something called Guetta in place of wax to draw on silk, because part of the silk dyeing process involves very hot water (wax is no good melted!) There are some countries in Africa that do something very similar to batiking, but with different designs and usually earth tone colors.
This project was an incredibly good time, and I'm excited about more like it in the future. As far as I'm concerned, it doesn't particularly matter what I'm doing but I'm happiest if I can learn something from it.


