Everyone has some kind of preconceived notion about bras before they get into sewing them. That you can only wear a certain type of bra, that they have to have 'x' to be suitable, etc. One of mine, and I have a few, involves foam cups.
When I started sewing my own bras, I was quick to abandon the molded cups when I found out another option existed, and all of my bras up to this point have included cut and sew foam. I was significantly less quick at working myself up to sewing a bra without any kind of foam at all. Why is that? Well, the obvious answer is nip coverage, but even the eternally cold has warm moments- seasons, even- and a very layer friendly wardrobe.
During a late night (I say late night, it was like 8:30...) bra making discussion with Lynda of Elle Joan's about her new bra tulle, and she mentioned that she had similar reservations about abandoning the foam as well. That really started me thinking about what exactly I was so attached to. I really wanted to try sewing a bra without it, and worse of all I couldn't pinpoint what was stopping me. I think, for me, that the answer lays more in those preconceived notions of what a bra should be - even though if there's one thing bramaking has taught me, it's to throw all those ideas right out the window.
With one of my subsequent orders of goodies from Lynda's shop, she actually sent me a bit of bra tulle to try, so I knew I'd have to make something from it - and what better opportunity to go foamless!
So. The bra tulle had been sitting prominently on my shelf for almost a month and a half, and every time I sat down to sew I'd look at it nervously. At the same time, decided that I was going to need to redraft my cup pattern - partially because I thought the bra tulle deserved special treatment, and partially because the top-cup part of my bustier bra pattern doesn't actually get stitched into the wireline - a cool design feature, but not universally applicable. This involved quite a few experiments (five, I think? The fit is nice, but I was trying for extra lift, while making style decisions on how wide I wanted the upper cup vs. lower cup pieces to be...) but I'm going to let you in on the secret that got me through my muslins:
I found this stuff in a shop in South Auckland for $6/M. It's got about the same amount of give as duoplex, and it doesn't unravel or anything unsavory like the plain woven muslin fabric I've been using. I think it's meant for basketball shorts or football jerseys or something like that. It only comes in sports colors, but I'm not sure I care. I made a nearly complete frame, tested cups until I was fairly certain the fit was accurate, and then mocked up a nearly finished version including some elastic to test the final fit. Worked like a charm!
New pattern in hand, I decided to go for it with my black bra tulle. I cut the pieces, sewed the cups together, stitched in my binding to make sure the insides were pretty.... and promptly realized that the seam binding looked way better as the outside of the cup than the inside.
It occurred to me - since I'm still currently sewing identically sized cups for rightie and leftie, that there wouldn't be anything wrong with flipping them inside out before sewing them to the bridge, so I did! The rest of the bra went together without a hitch, and the new pattern fits excellently, complete with an internal powerbar for improved lift! I did end up ripping out and re-stitching the seam binding on by hand after the bra was complete, because it was puckering just enough to be irritating...it was originally sheer nylon binding, but I replaced that with bias strips of silk dyed black to match. Hugs the curves much better, and not as bulky, although it was quite a hassle to hand stitch the wiggly silk to the unsupported bra tulle, and therefore still a few wrinkles.
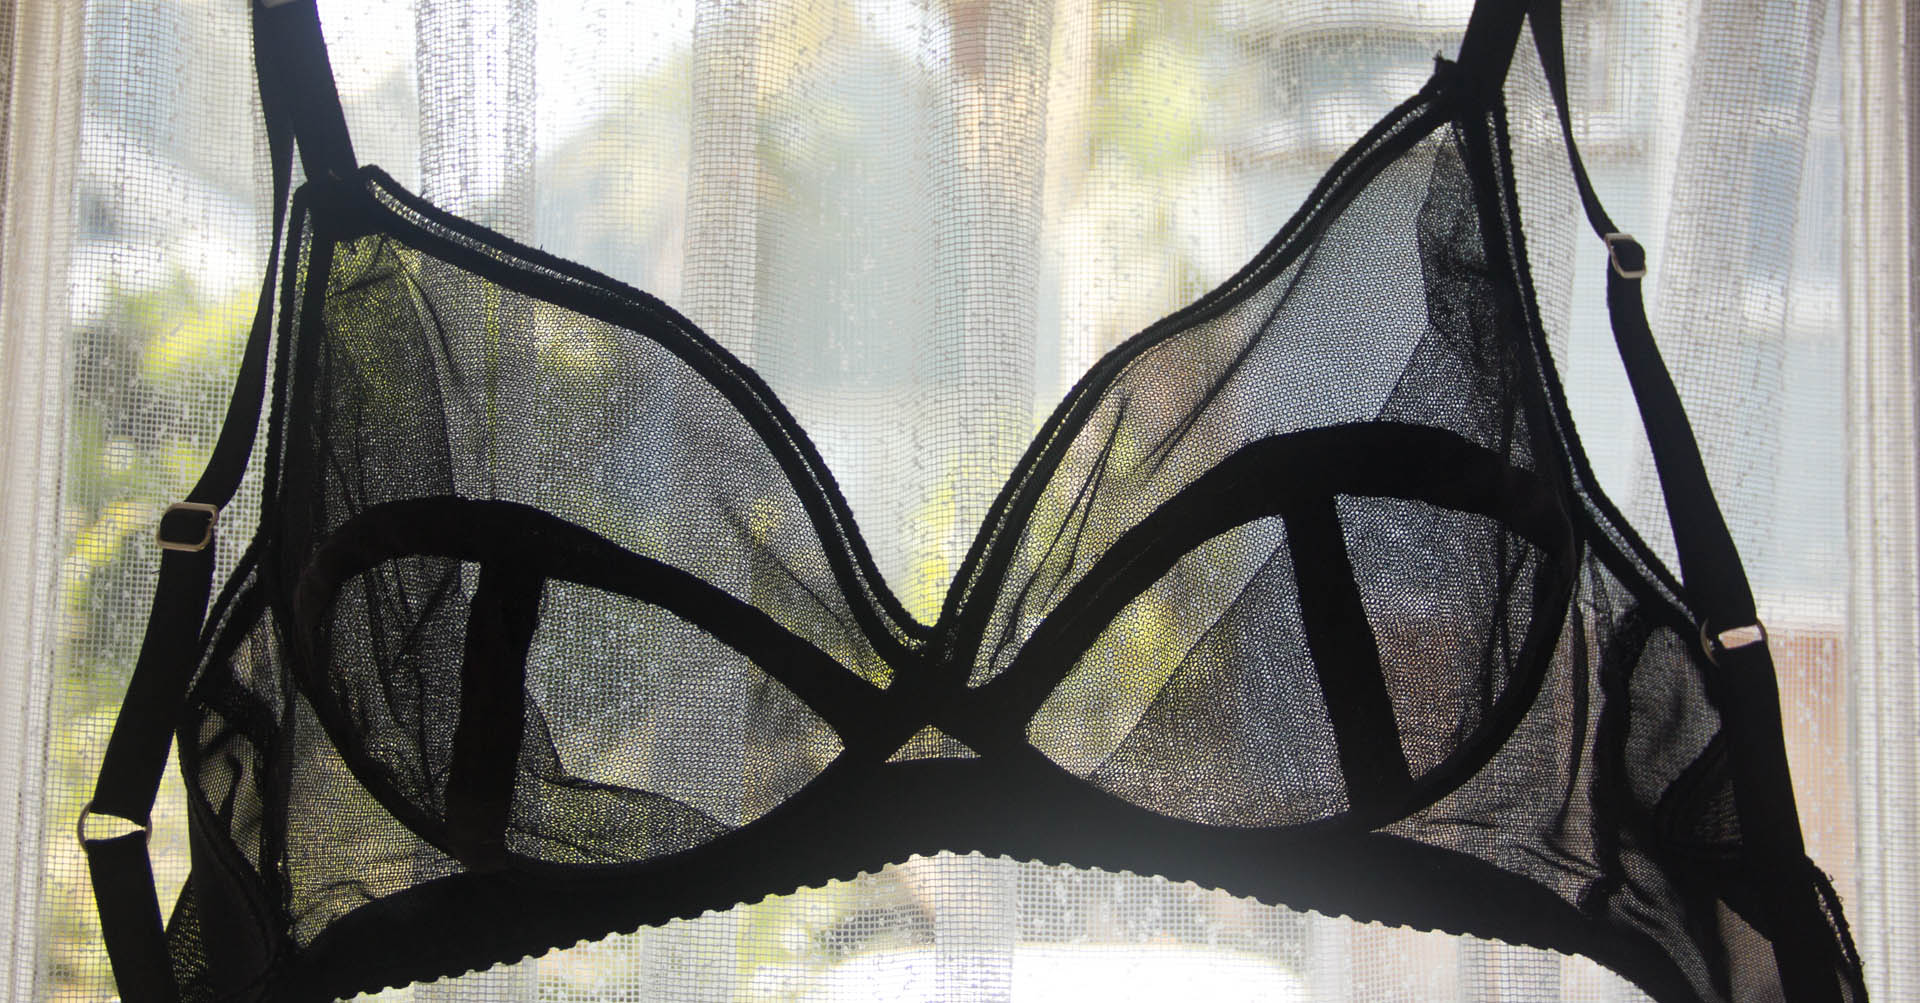
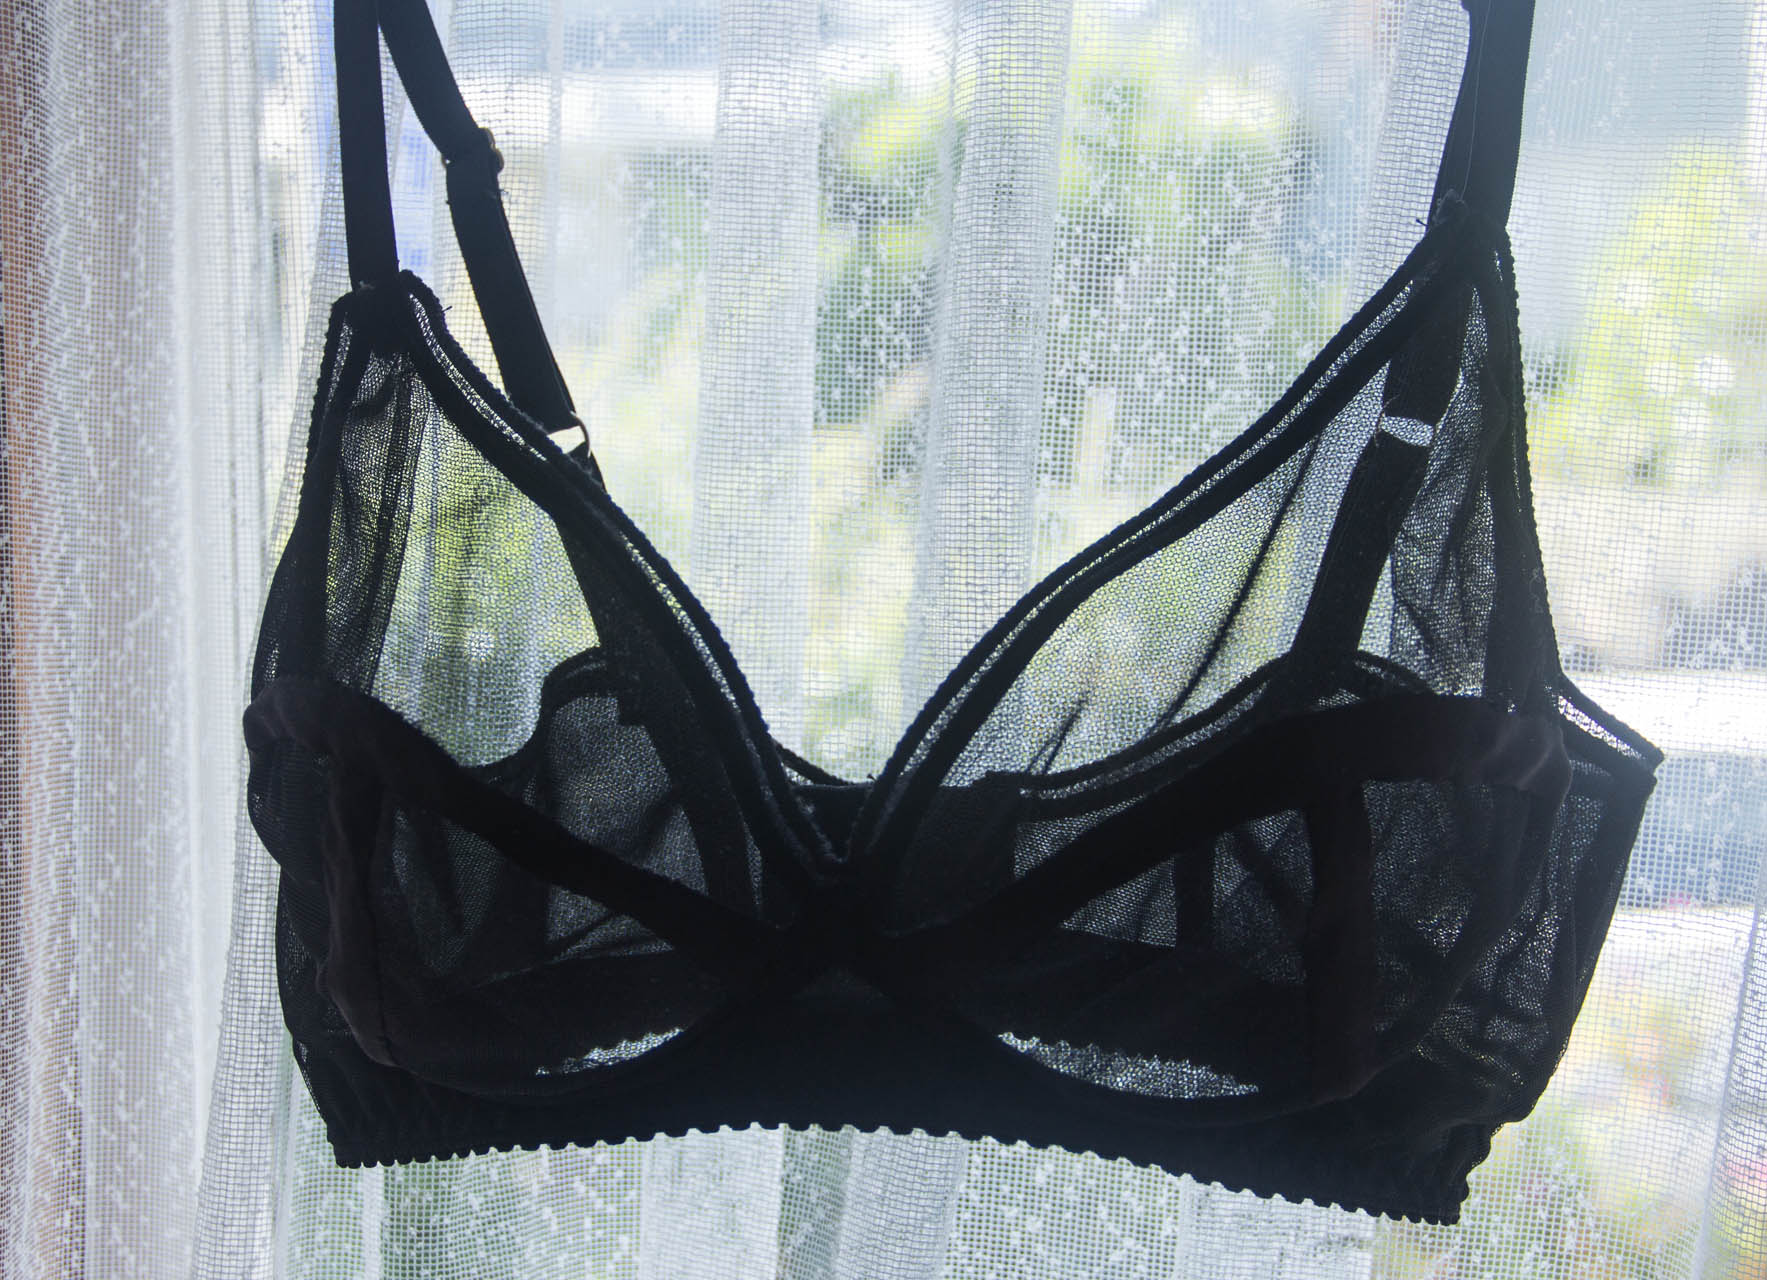
So here's the down and dirty: Self drafted version 2.0 (more like 8.0 but who's counting) three part cup with full band and internal powerbar cut with horizontal DOGS. The cups are two layers of bra tulle (cut in opposing directions for ultimate stability) with sheer nylon lining for seam binding, and bridge is one layer of bra tulle plus one layer of sheer nylon lining. The elastics for this one came from the same odd little shop in south Auckland that doesn't have a website, and I'm not entirely sure I trust the quality - but hey, worth a try for a pretty picot, and I know how to make more if it wears out ;)
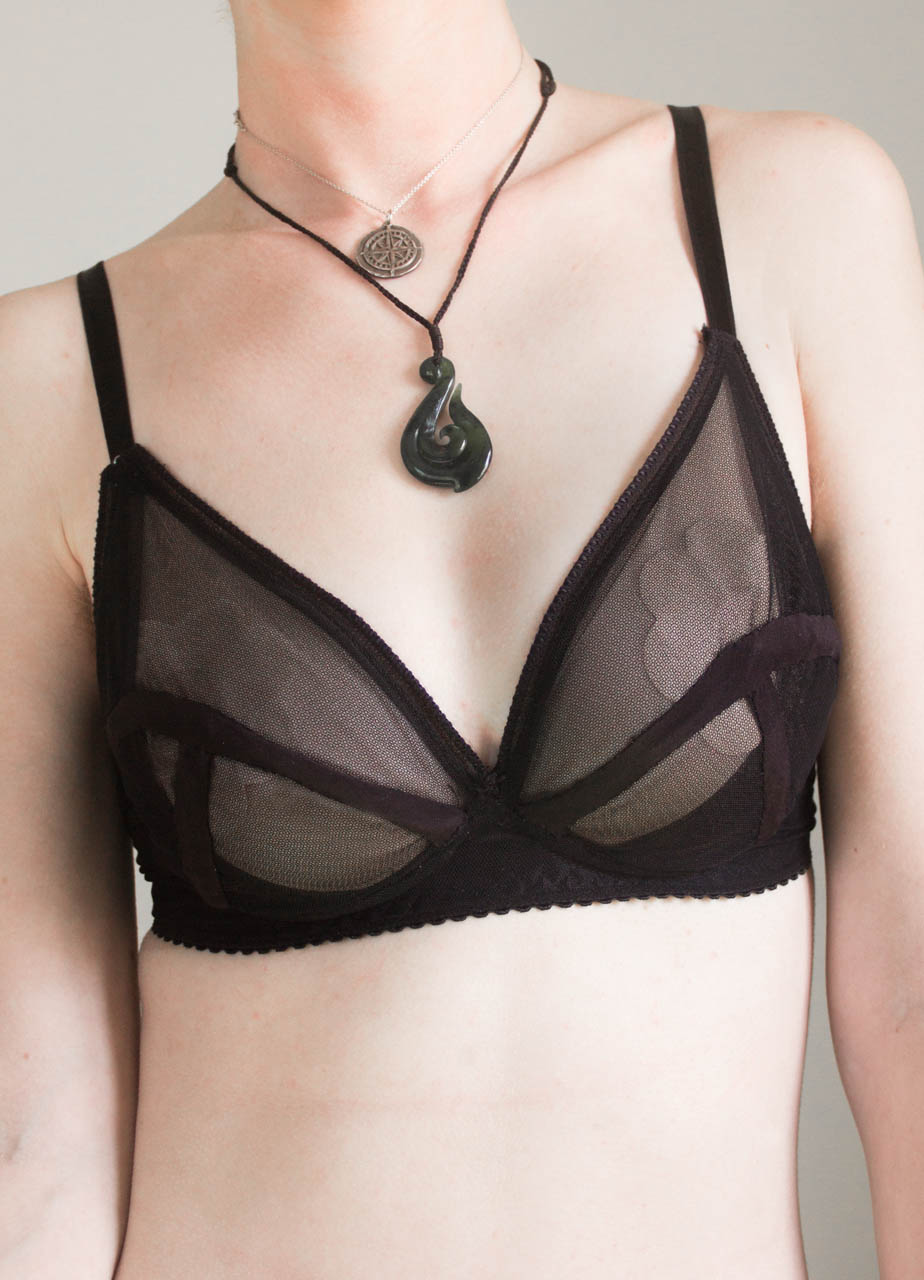
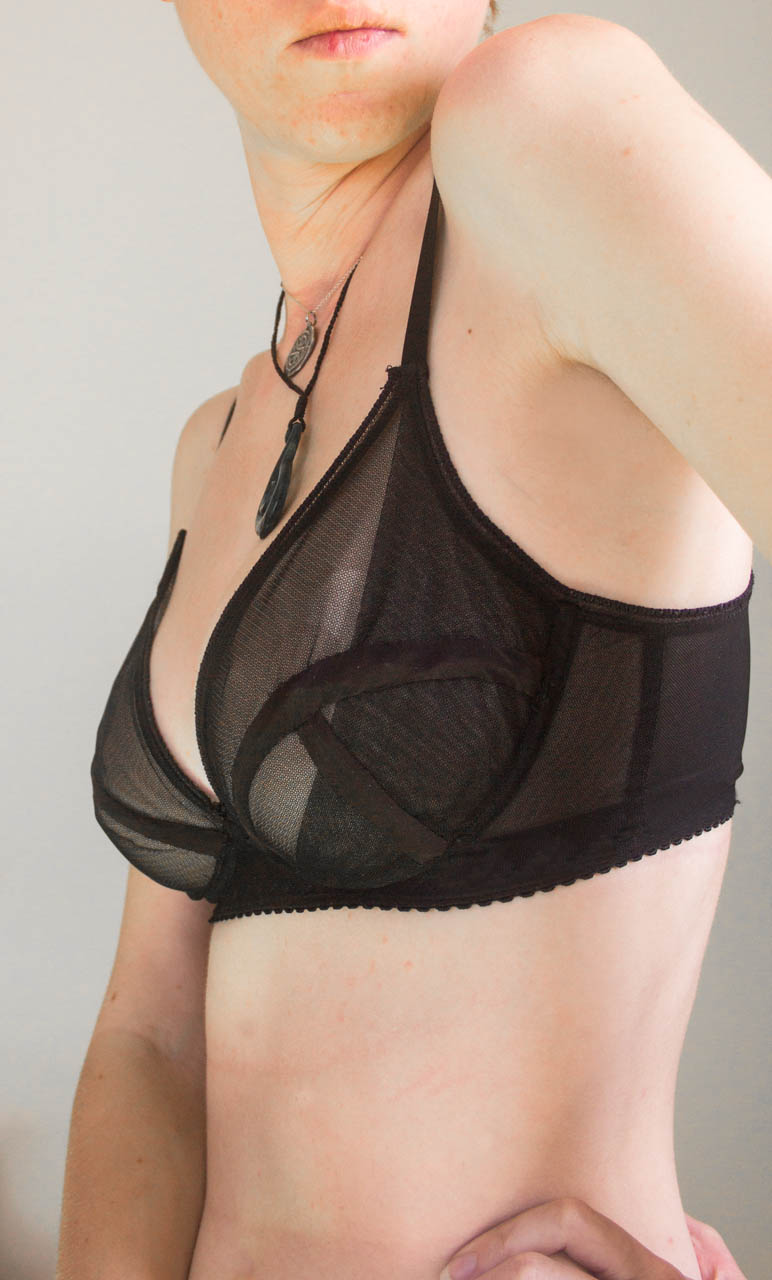
The bra fits well. there are a few wrinkles that I'm fairly certain are due to my hand stitching, and I could have done well to be neater with my strap attachments, but it fits. There's just something... odd about it. It looks fine under a shirt so I don't think it's the shaping: I'm fairly certain it's just all those lines going on, visually bisecting things in different directions that's a bit jarring. It took me a while to figure out why I wasn't totally satisfied with this bra (I thought I didn't like it because it didn't fit, except it does fit - comfy to the point that I have to do a subtle boob-grab to figure out if I'm even wearing a bra)... I'm using this same pattern for my next bra (nearly done!) - in theory we'll find out if it still looks odd in an opaque fabric, and with the addition of foam again.
I've worn this bra a few times out in ~the world~, and I can't say I've discovered anything particularly scary about going foamless. I wouldn't wear it with a very sheer shirt... but let's be honest, I fully line almost all the tops and dresses I make, and everything I wear fundamentally serves my need to be as bundled up as is socially acceptable because I'm a perpetually cold human. Besides, not wearing it with a sheer shirt probably has as much to do with its color as it does the lack of foamy insulation.
This bra has already worked its way into my rotation, and seems for the time being to be holding up pretty well. I'm not sure if I'll be building an army of sheer bras, but it sure is nice to have a bit of variation in the ranks, especially for these hot summer days we seem to be getting a lot of lately. Another bonus: After washing, this thing dries in about 15 minutes, whereas foam has been known to stay damp for ages.
I was a bit worried that this space was going to be suffering from the Christmas Sewing Cone of Silence by now, but as it turns out, my DIY Christmas list is nothing short of pitiful this year. As in, there's one small project on it. The rest is..*gasp!*...storebought. (Christmas knitting is not applicable in the southern hemisphere either...) Good thing for the blog though: there's no need for the cone of silence after all. This bra's (much more colorful) pattern-twin is already finished, and after I take pictures we can do a little comparison of the different materials - just in time for my nearly two week long Christmas vacation!


