

Not too long ago, I showed you the draft and wearable muslin for this dress - the wearable muslin which was also destined for a beach trip on my Rarotonga holiday. I'd say it served its purpose well, wouldn't you?
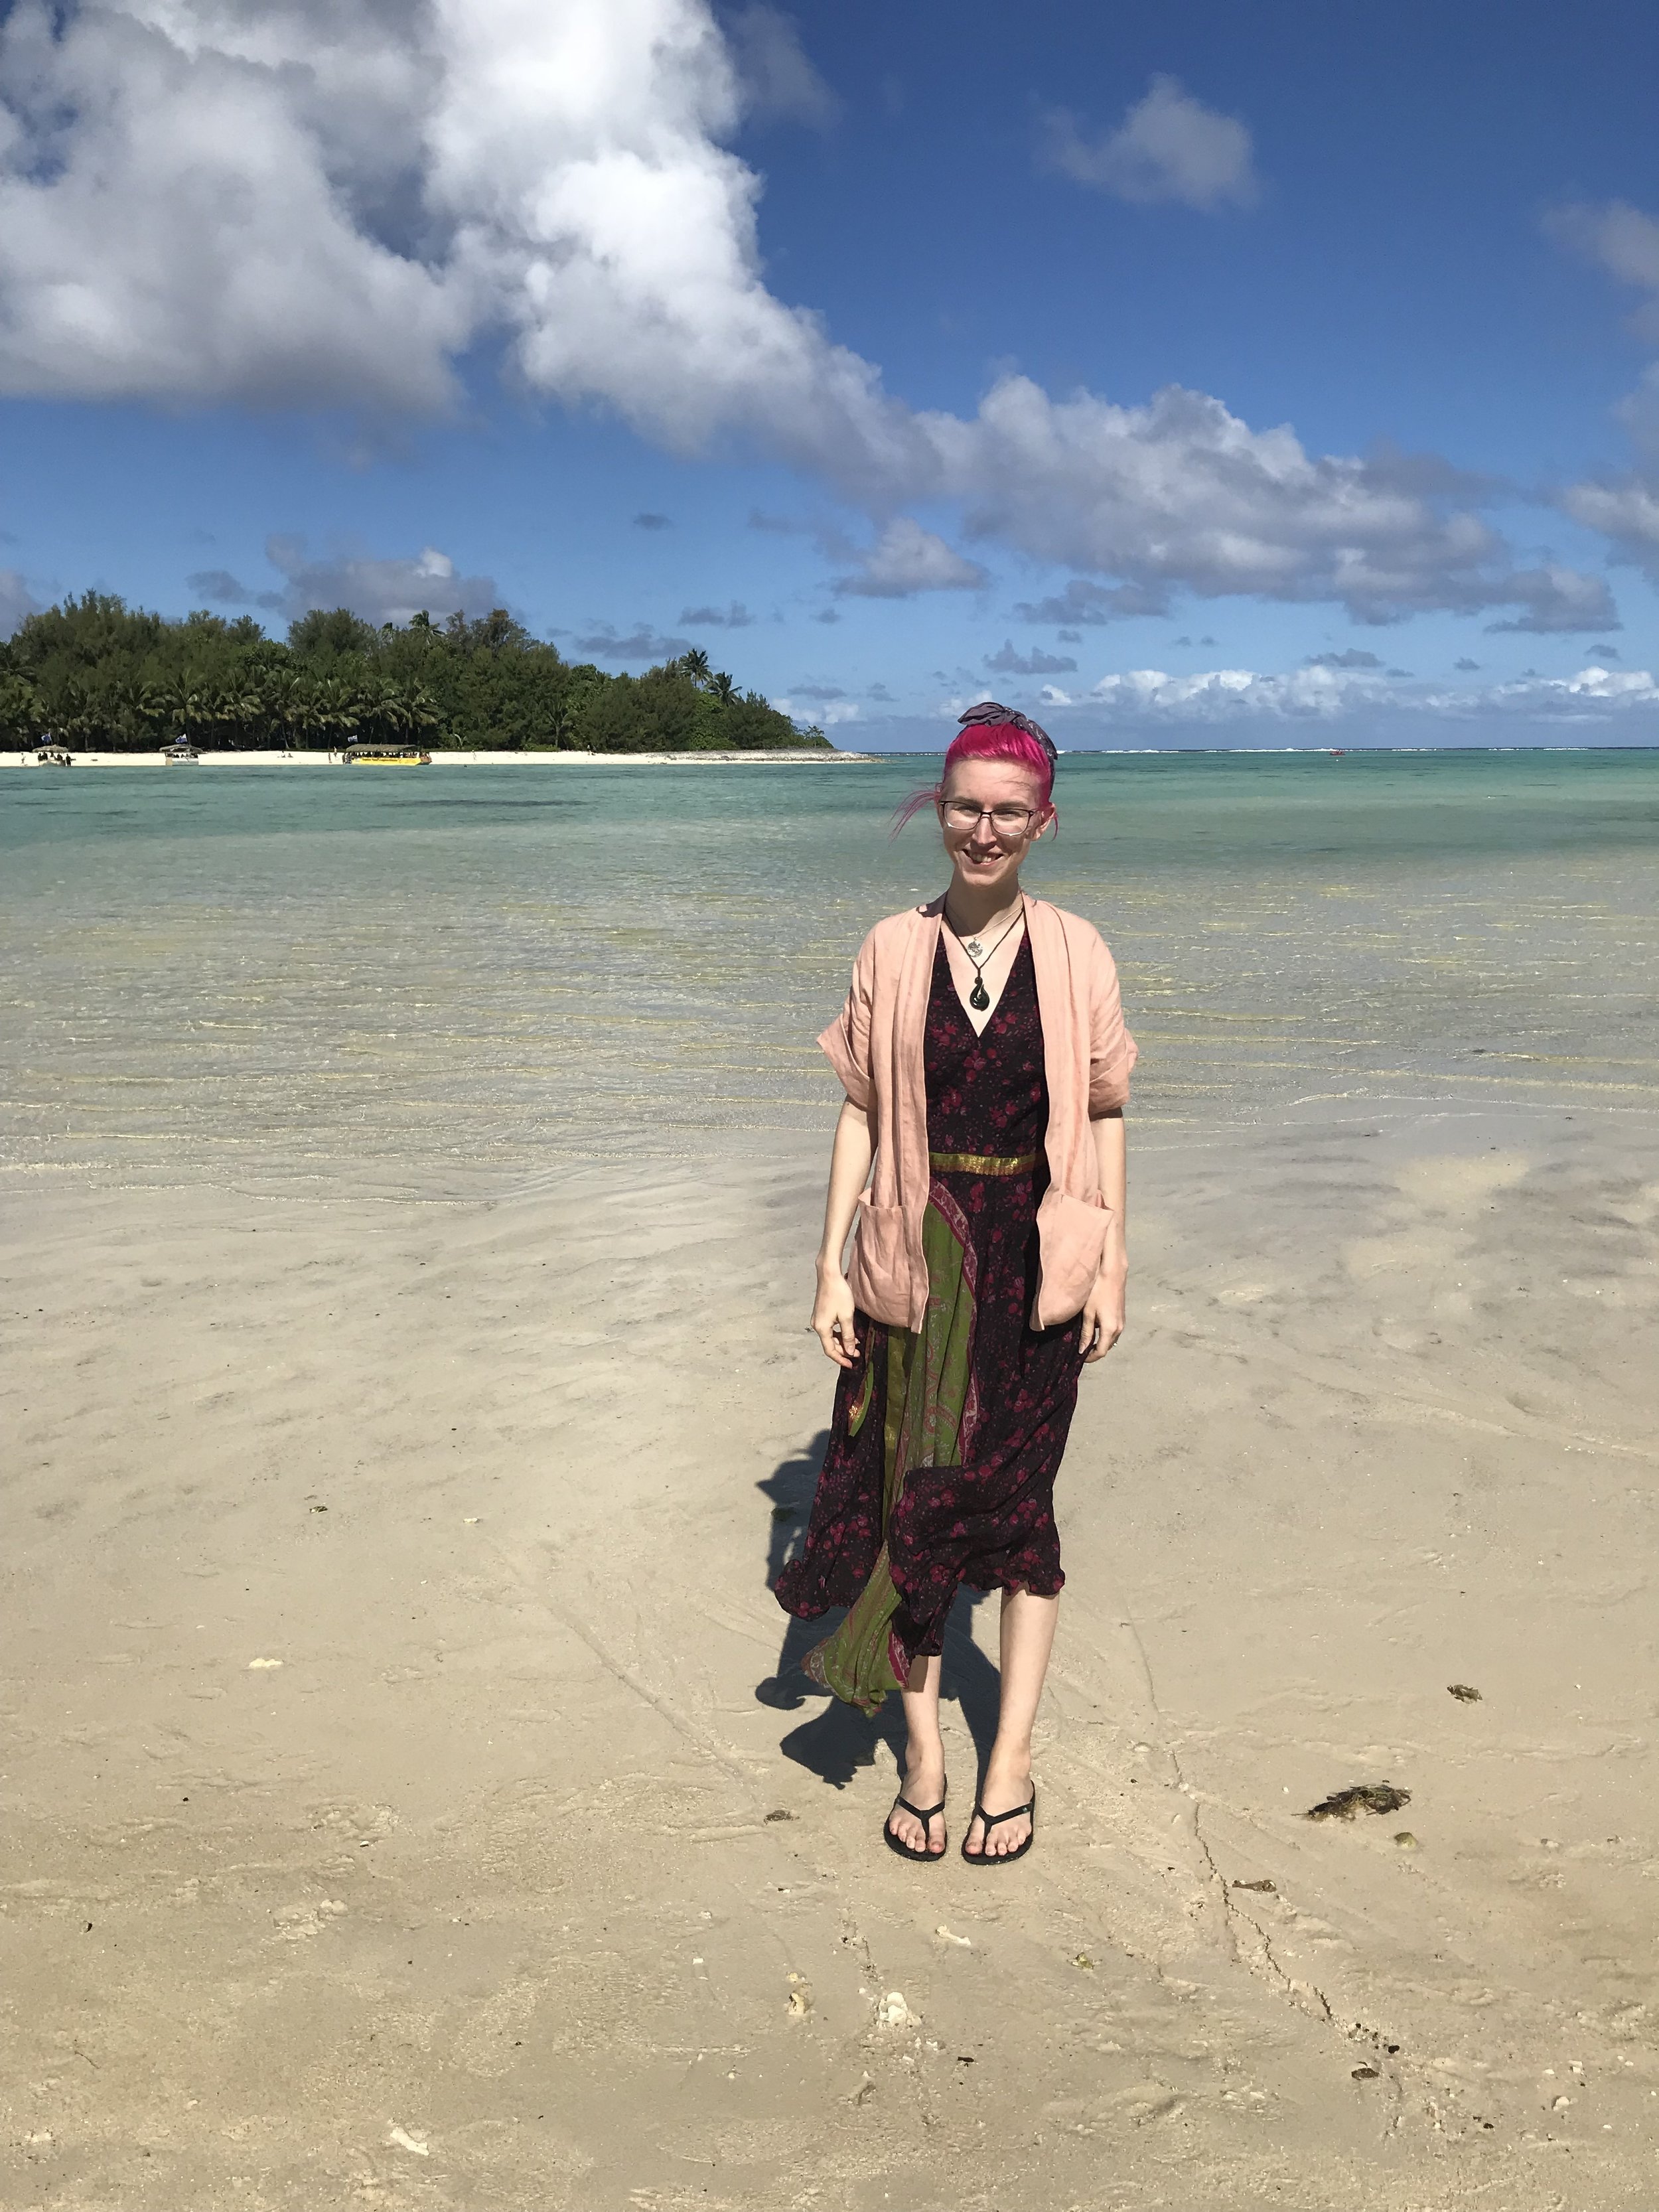
Okay. It was super windy on this day so not the most incredible picture, but hey - we got there in the end. I have more to show you later ;)
The weekend after I'd finished that dress, I moved on to the final version. It's the same draft, of course - but I daresay the similarities end there. I've been referring to this project as a 'proper fancy dress' and telling myself it had been such a long time since I'd made such a proper fancy dress - but I just finished Lill's graduation dress recently, and also I am a person who is right in the middle of making her wedding dress... Honestly. The lies we tell ourselves. It does, however, have a couple of fun couture techniques that I want to show you guys!
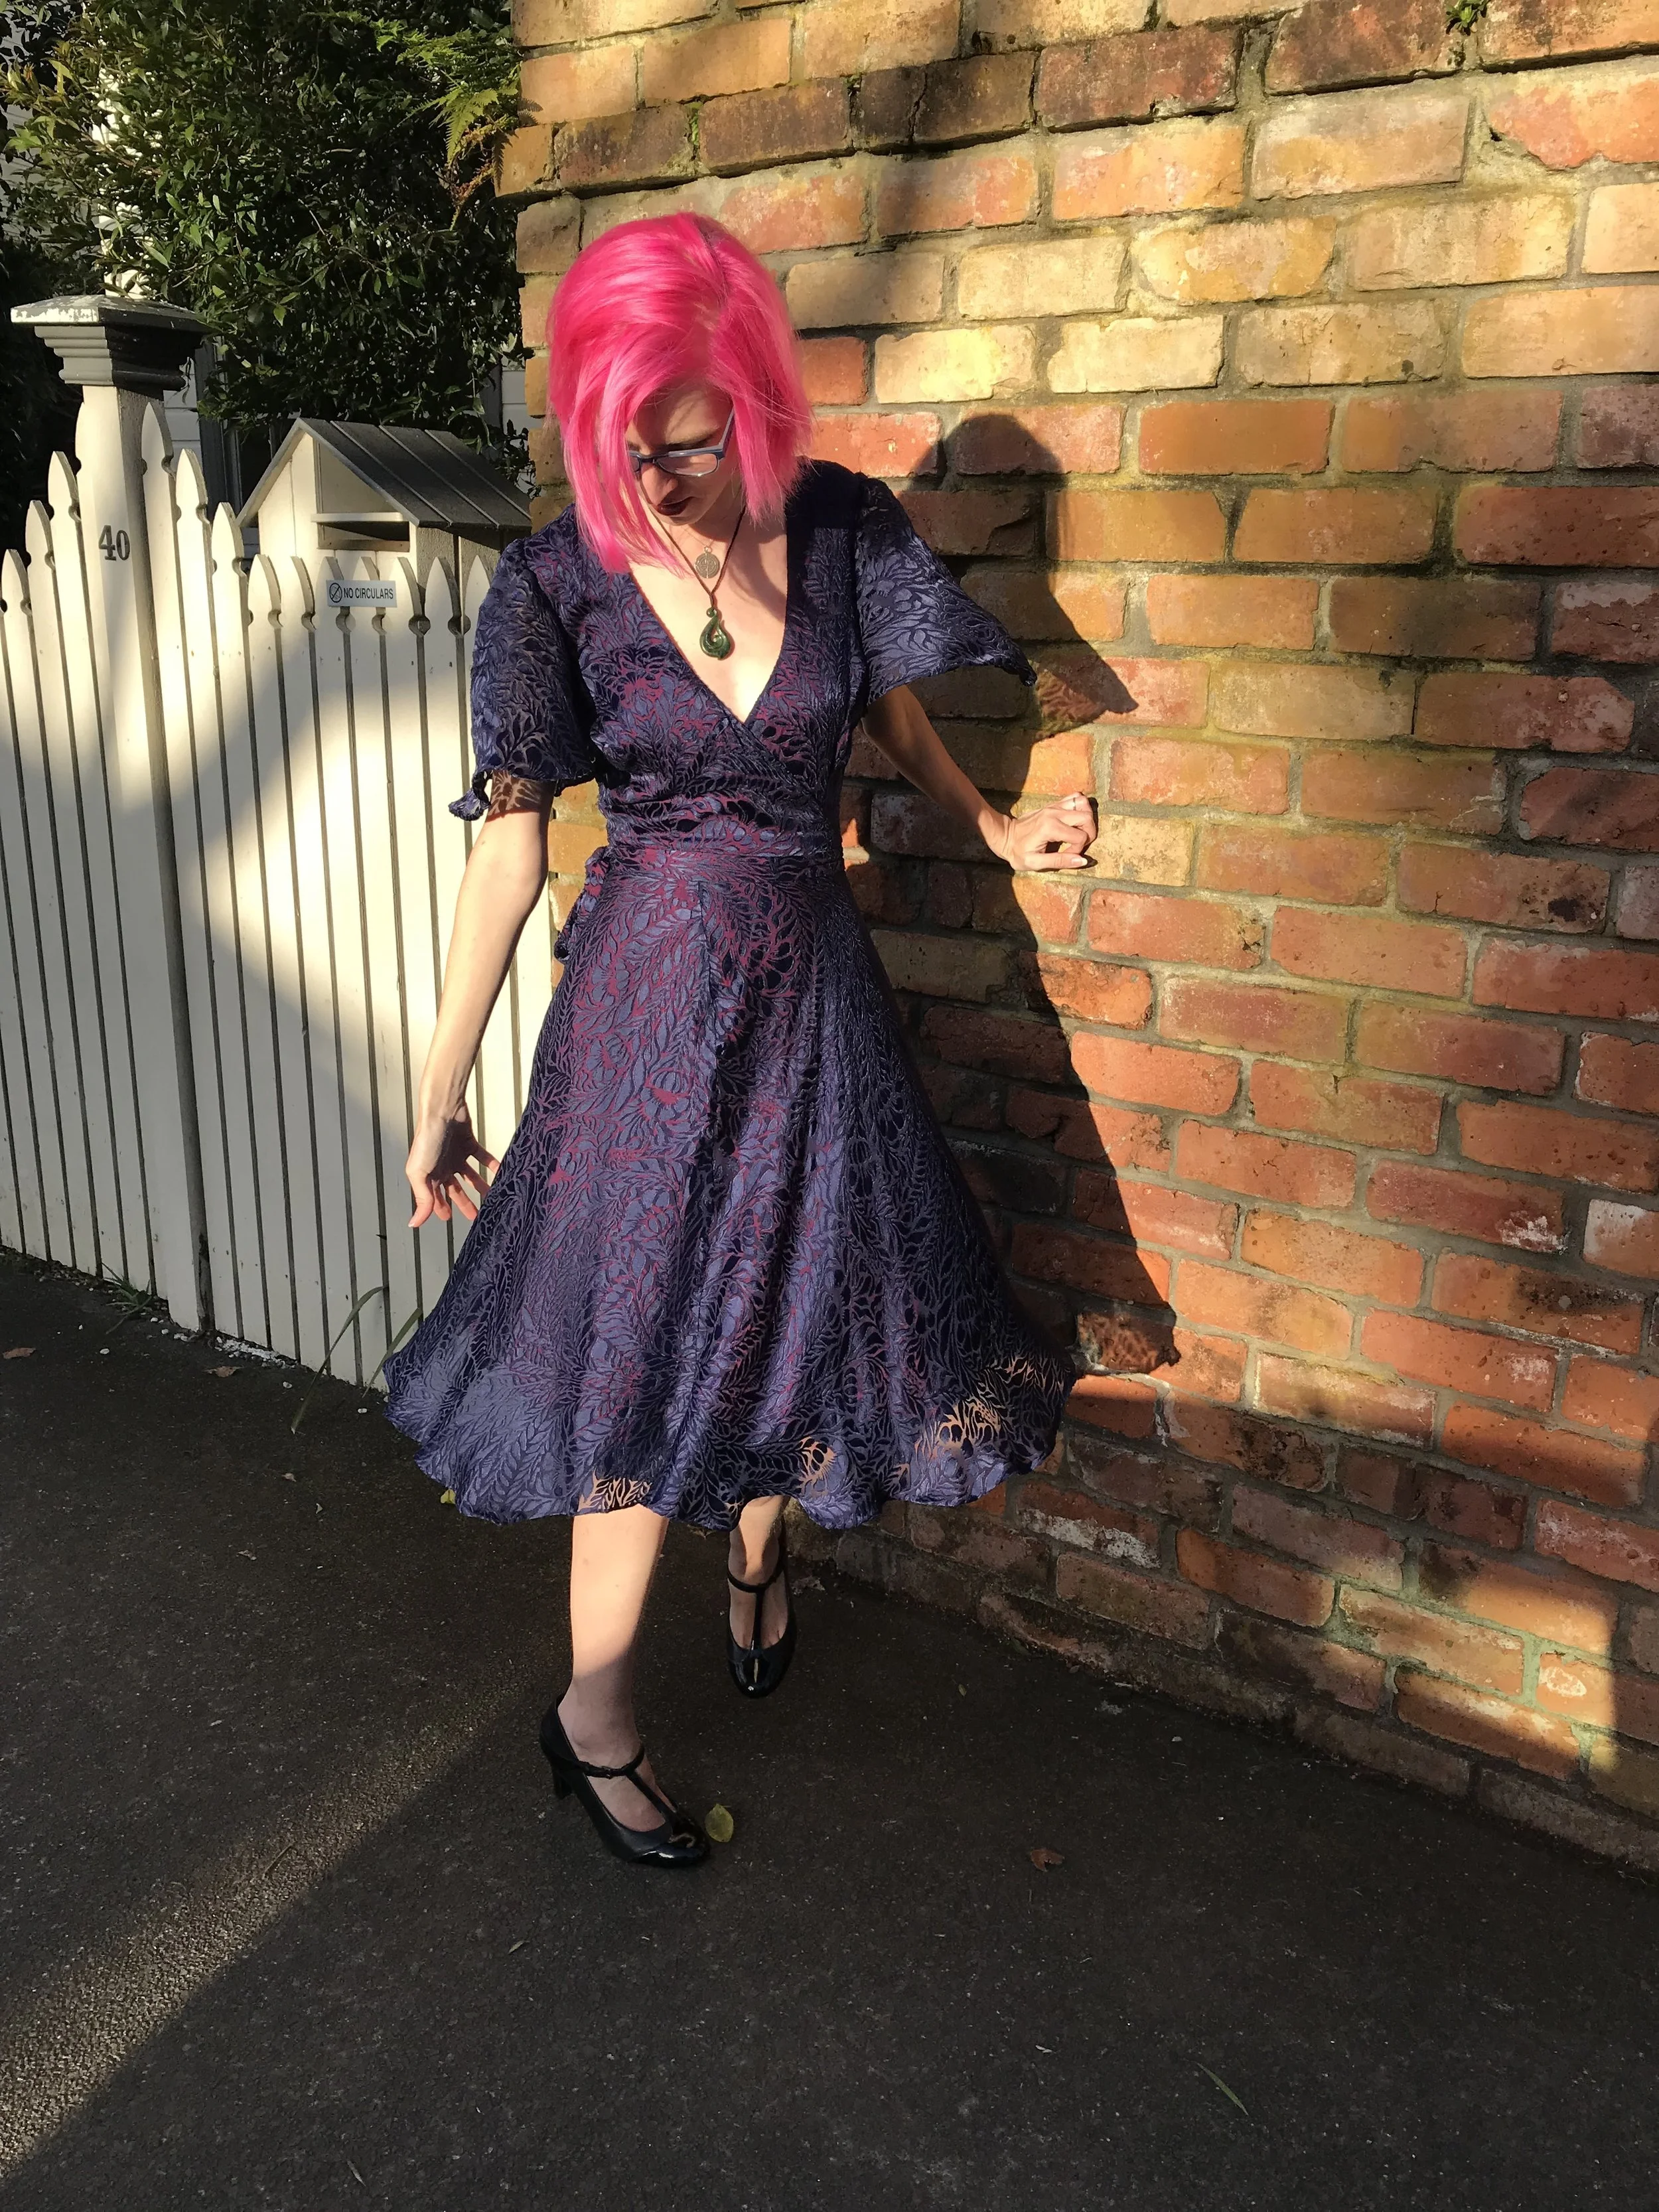
I had so much fun twirling around while my friend Jay took photos of this dress - there are hardly any photos of me standing still!
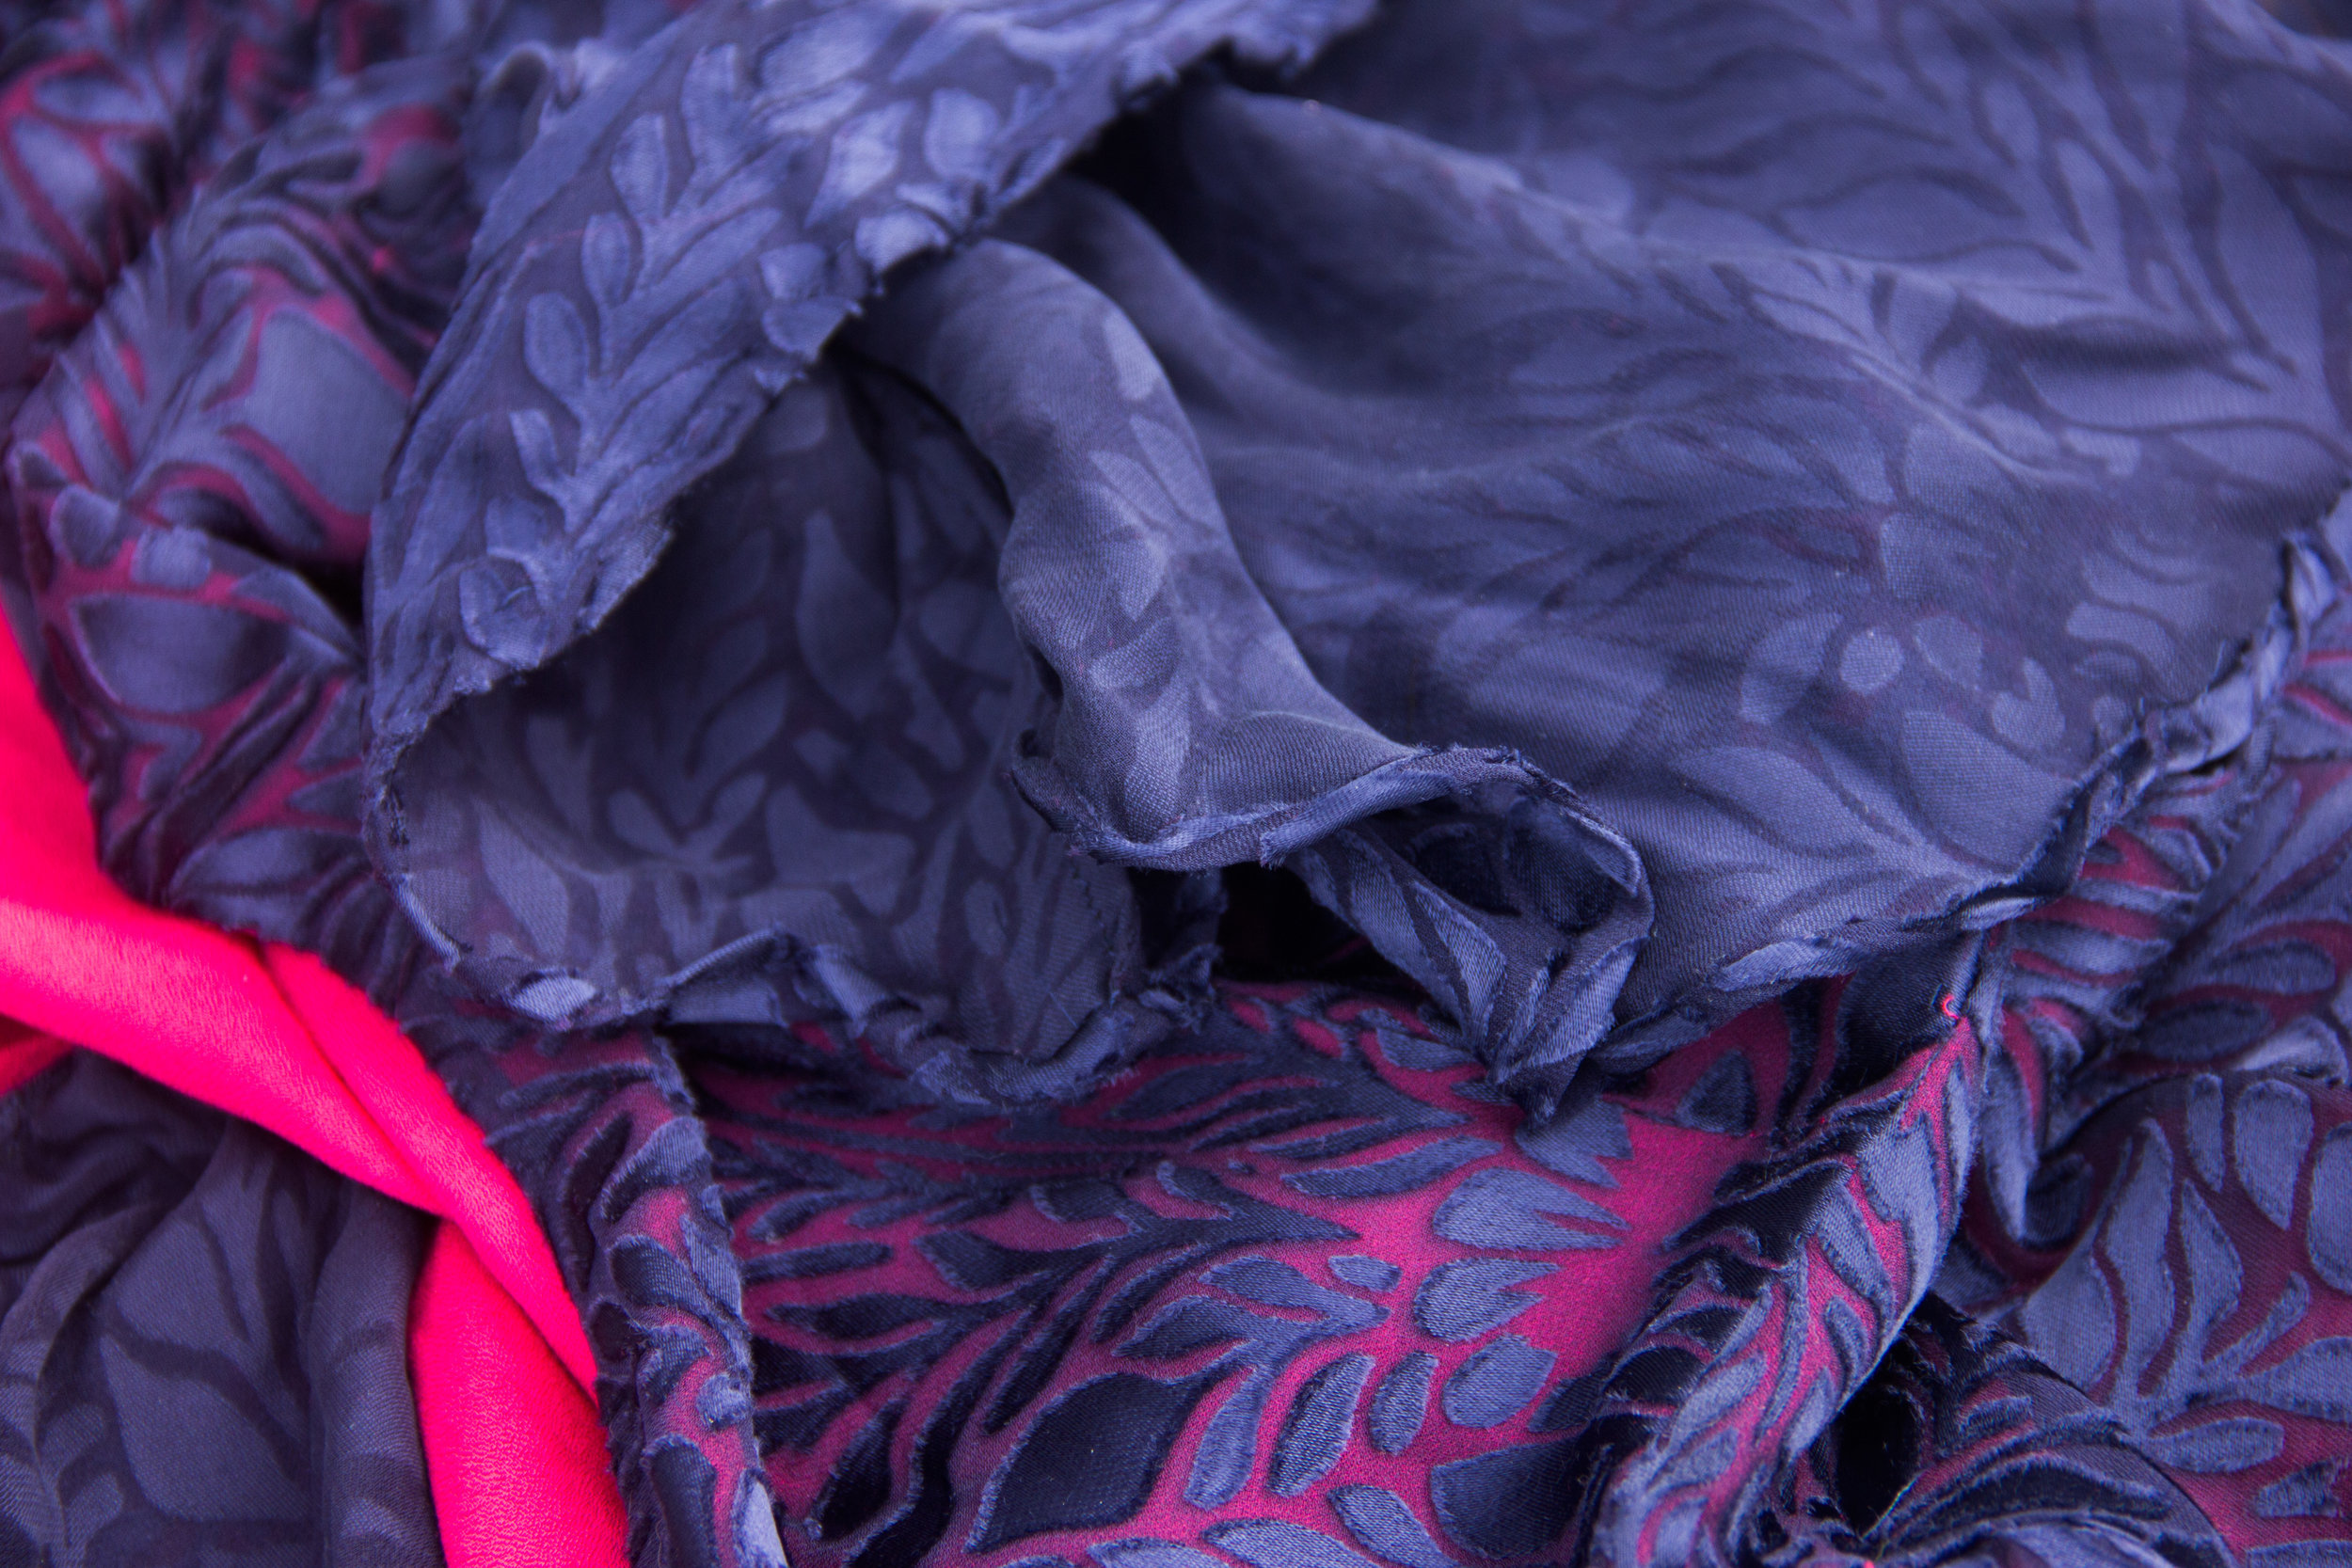
Let's not get ahead of ourselves though - fabric first. The navy is a silk/rayon satin burnout on a chiffon base from Draper's Fabrics, and the pink underlining is a viscose from their shop as well. I went in knowing that I really wanted to make my pink fur coat for Frocktails as well (because I'd be cold and so much less faux-fur-bulous otherwise) so I wanted something that would a) match my hair, b) match the coat (which is almost the same color as my hair), and c) be useful and wearable as a winter special occasion dress, of which I had none. The result? I decided to use the hot pink viscose to underline the navy, which emphasizes the design of the burnout, gives the dress structure and opacity, and ties it together with my pink coat without being too outrageously matchy-matchy.

I prewashed both fabrics separately in a cold delicate washing machine cycle - I don't intend to run the finished dress through the washing machine ever again - hand washing will be fine - but I needed to know I wouldn't have any surprises. The burnout leaves a trail of little navy fuzzes wherever it goes which isn't too surprising, but other than that they both washed up beautifully. Cutting went without incident - I cut the bodice underlining pieces first and then laid them out on the main fabric to use as a guide. The sleeves aren't underlined, but everything else is.

Twirling outtake photo: one of probably seventy :)
Technically, it's not a 'true' underlining because some of the seams are treated separately - to construct the bodice, I first french seamed the shoulders of the main fabric and underlining fabric individually. Then, I sewed the two together at the neckline, right sides together, stitching from the CB to the left wrap and then the CB to the right wrap. Then, to finish the edge, I ran a line of narrow zig-zag about 3/8" away from the stitching line, and trimmed the excess seam allowance off as close to the zig zag as possible. This seam finish is buried between the underlining and the main fabric, and is barely visible under the top layer. Originally I had planned to bias bind the edge, but upon testing I decided it was way too bulky. The zig zag trick is one I learned from a 'couture sewing techniques' craftsy class - I inhaled a solid 12 hours of craftsy videos a few months ago when they had their 'free watch day' - filled a notebook with scribbles on techniques for seam finishes, corset construction, bras, and every random thing in between.

After the neckline was finished, I treated the rest of it as a proper underlining - the darts are sewn simultaneously, and the side seams are french seams that include both the main fabric and underlining. I did end up adjusting the angle of the bust dart after I'd cut everything out, which is why the edge of the bust dart isn't tucked away inside the side seam, but it drastically improved the hang of the bodice so I'm okay with that small sacrifice. The sleeves - with no underlining - are treated in a similar way to the neckline seam - stitched, zig zagged, and trimmed. I suppose the 'modern' equivalent of that seam finish would be an overlocked edge, but this is a much smaller, more delicate, and less obtrusive seam. Once again I was originally planning bias binding but it showed through the sleeve on the outside in a way that was bulky enough to bother me.

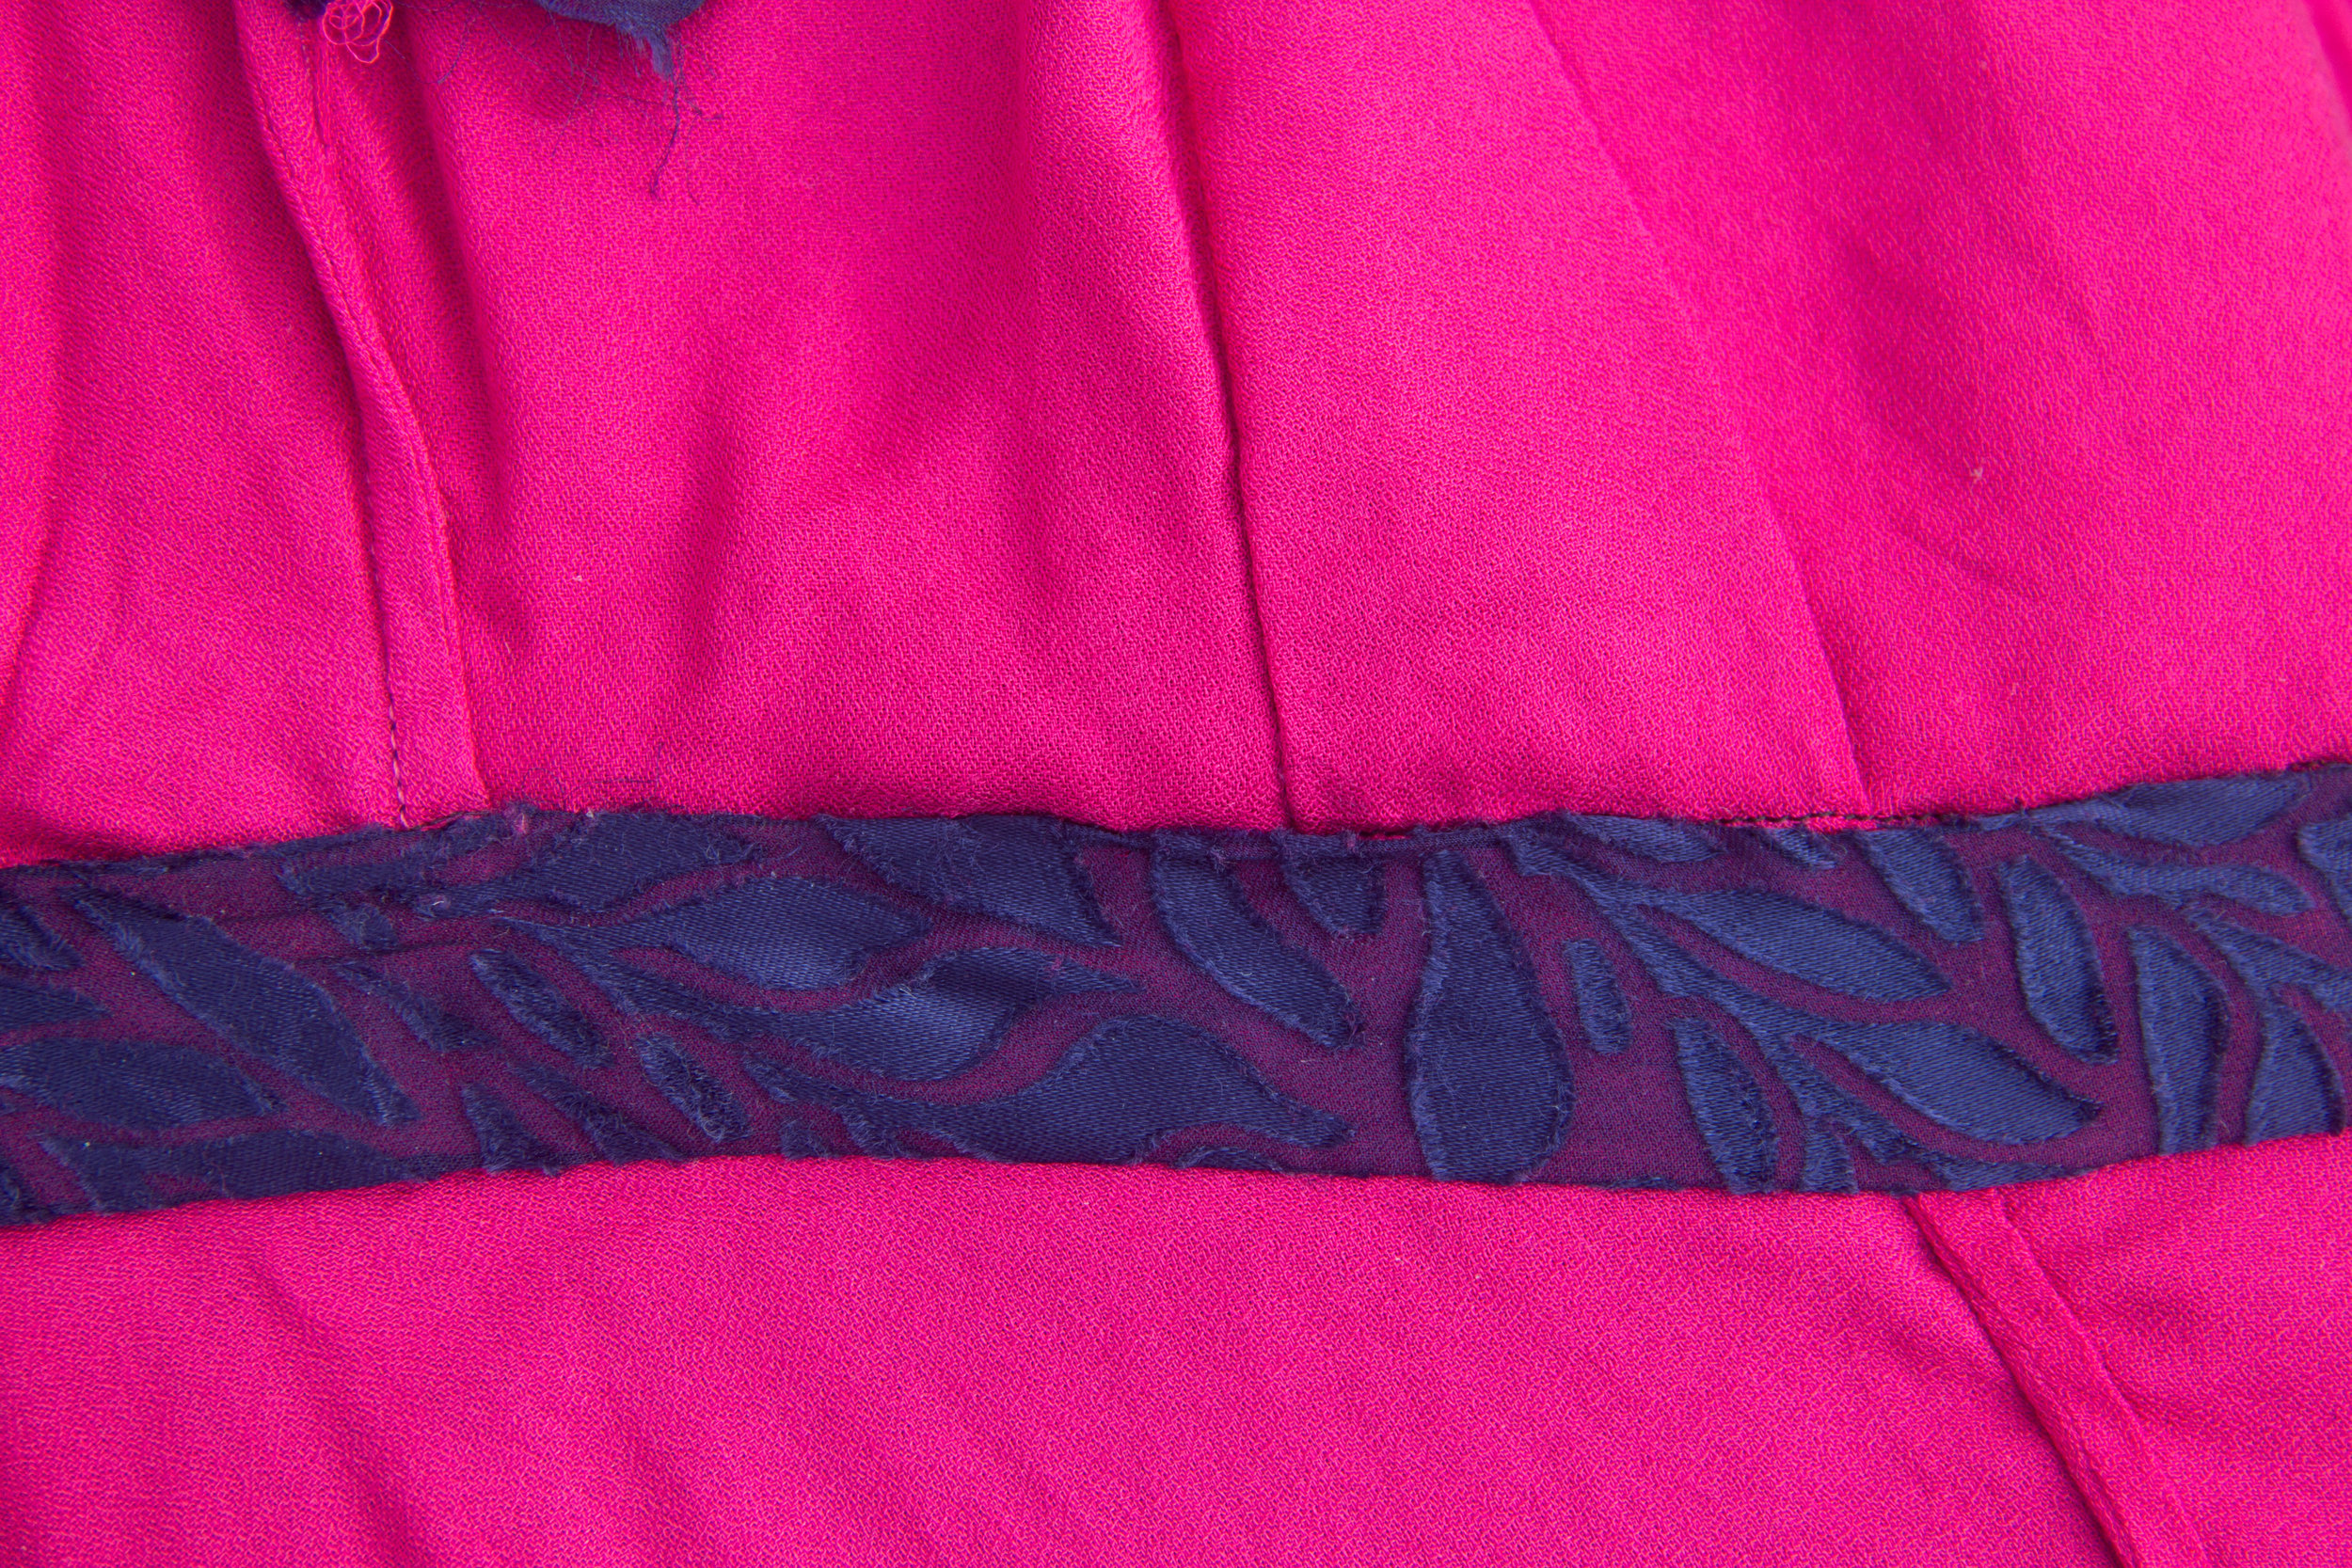
Note the contrasting thread color" blue in the bobbin and pink in the upper thread which I specifically worked out for the neck seam, but then I sewed things upside down for this sleeve. It's our little secret.
Now, the skirt. Constructed in four panels, the skirt has a 'lining' rather than an 'underlining' - if you're here for a sewing vocabulary lesson, that's because the pieces aren't attached to each other at the seams - they behave and are treated independently of each other, which means it's not an underlining. It also means I had two separate full circle skirts to hem. I took the easy road and used my Bernina's narrow hem foot for the pink underskirt because Frocktails was the day after I got back from my week in Rarotonga so I was a bit crunched time-wise, but I was stubborn about the burnout fabric and decided that the only hem that would be satisfactory for it was a hand rolled handkerchief hem. Same for the sleeves. I reasoned that technically, this could be classified as practice for the wedding dress, and planned to hem the dress in Rarotonga - or on the plane ride there.
A rolled hem! I do love a good rolled hem.
Even though I was specifically paying attention to my yardage and layouts, I still ended up having to piece together both the skirt and the underskirt. I don't know what it is with me and circle skirts - I even did the math this time! Of course, I put the pieced panels at the back of the dress, and I managed to cut the inserted bits with the grain going in the correct direction so they hang nicely with the rest of the dress, but the fact of the matter is that I know they're hiding in there. One of these days, I'll break my streak and end up with enough fabric for my circle skirt! (is now a bad time to mention that my wedding dress has a circle skirt? Good grief, I am NOT piecing that thing together!)

After the bodice and skirt were constructed and attached by the waistband, I left the whole thing to hang for a few days before I leveled the hem. This, dear reader, turned out to be a terrible, horrible, very dumb mistake. It was okay in the end, but I hung the dress by its shoulders with a coat hanger rather than by its waistband with a pants hanger, and the result - although the hem dropped - was that the neckline of the dress stretched out somethin' awful under the weight of all that skirt. I, of course, should have known. After some panicked tucking, pinning, and thinking, I realized the easiest fix would be to run some thick thread up through the neckline inside the seam and use it to slightly cinch it back to normal. I could then steam it to get rid of any bubbles (which, as it turned out, I didn't end up with anyways!)

I used leftover silk buttonhole thread from my Vintage Vogue coat - it's super thick and also very slick so it slid through the seam easily. I tied of each end inside the waistband, and it's accessible should I ever need to go in and re-adjust - but the result is that the neckline once again sits flush against my chest, even when I bend over! The most important thing I've learned here is that this dress needs to be stored hung by its waist, not by its shoulders. Note. To. Self.
I didn't have many surprises with this project because I'd made the wearable muslin, and I was ever so happy when it was finally done! I did take it on vacation to hem, and then just gave it a good pressing when I got back, and we were off to the ball! My friend Rachel also sewed with the same fabric - she made a Papercut Patterns top and of course ended up with a totally different look! I love that we had fabric overlap, and that our ideas were so different from each other! There were also several guests wearing their own versions of the Papercut Sapporo coat, and it was very cool to see so many of them in different ways!

You'll notice that my Frocktails outfit also included the Pink Thing - but she's getting a blog post all her own, so you'll have to take these photos as a teaser for now!

Frocktails was as amazing as expected, if not more so - I was friends with the majority of the attendees on Instagram already, but had only met three of twenty four in real life! I'm so happy to have all these amazing new friends, and to have had the opportunity to spend a night out with so many like-minded people! We're already planning meetups and shopping trips which is so cool, and they're such an inspiring group of ladies. I never dreamed that a silly little blog, a camera, and a sewing machine would land me in the company of so many amazing women, but I sure am glad it did.